A Golden Reef Tank

halmus

Registered Users
M.A.S.C Club Member
ex-officio
Andrew_bram;672205 said:
I want to see this thing wet. I wish I had 1/4 the patience you must have.
I am on vacation now and I'm still building things in my head while I'm staring at beautiful snow capped mountains. I wouldn't say I'm patient but I do have some lofty goals that are easier to accomplish with the hard work out of the way now.

Thanks for following along. It will be wet some time this year.

Balz3352;672209 said:
A lot of pee would not have been used
:) Theres a lot of talk about pee on this forum. I think I'll avoid asparagus before I dose with home made ammonia.
 

halmus

Registered Users
M.A.S.C Club Member
ex-officio
Any opinions out there on Reef Breeders Photon V2 lights? I want to put something over the QT tanks that I can dim down significantly for minimal light during normal fish QT but also ramp up to a level to support coral if I ever chose to hold them there.

I'm just looking at these for the three fish QT tanks with a 24" light over the 36" tanks.

I've also looked at Reefbrite XHO strips but I like the broader spectrum of the Photons.
 

halmus

Registered Users
M.A.S.C Club Member
ex-officio
Had anyone used the mortar mix from Marco rocks for their tanks? I'm curious if it leaches out the nasty film that Portland cement does once it's wet.

I want to build the rockwork in the tank, so it will be wet for the first time in the tank. I don't want to risk messing up the glass with a film from the mortar product.

Any other ideas for building open rockscape without buying 50 x sticks of the normal epoxy we have available?

I've seen most of the tricks using PVC as a structure to build on. I haven't ruled that out, but I'd prefer not to if possible.

Thanks for any input!
 

Balz3352

Reef Shark
M.A.S.C Club Member
halmus;673219 said:
Had anyone used the mortar mix from Marco rocks for their tanks? I'm curious if it leaches out the nasty film that Portland cement does once it's wet.

I want to build the rockwork in the tank, so it will be wet for the first time in the tank. I don't want to risk messing up the glass with a film from the mortar product.

Any other ideas for building open rockscape without buying 50 x sticks of the normal epoxy we have available?

I've seen most of the tricks using PVC as a structure to build on. I haven't ruled that out, but I'd prefer not to if possible.

Thanks for any input!
Marcos did not do anything nasty in mine and i used a bucket. I highly recommend. Only thing ill use in the future! Very easy to use and cures as hard as cement.


First time mine was wet was also in the tank. No problem whatsoever. I would use this product again in a heartbeat.
 

SynDen

Administrator
Staff member
M.A.S.C Club Member
M.A.S.C. B.O.D.
M.A.S.C President
M.A.S.C Webmaster
Ya, Marco doesnt contain any of those cement ingredients that cause high ph and need to be leeched out. Once dry you can put it right in the tank
Ya, pvc makes the structure and rock work a bit bulky, acrylic rods I think would work much better in your case
 

halmus

Registered Users
M.A.S.C Club Member
ex-officio
Balz3352;673222 said:
Marcos did not do anything nasty in mine and i used a bucket. I highly recommend. Only thing ill use in the future! Very easy to use and cures as hard as cement.


First time mine was wet was also in the tank. No problem whatsoever. I would use this product again in a heartbeat.
Thanks for the feedback B. I thought you used it. My biggest concern was potential damage to the tank but it doesn't look like I need to worry about it.
 

halmus

Registered Users
M.A.S.C Club Member
ex-officio
SynDen;673223 said:
Ya, Marco doesnt contain any of those cement ingredients that cause high ph and need to be leeched out. Once dry you can put it right in the tank
Ya, pvc makes the structure and rock work a bit bulky, acrylic rods I think would work much better in your case
Thanks for the info.

There was a guy in Oregon that pulled a worm out of plumbing in his tank that was multiple feet long. He used open PVC for the rock understructure and it was the perfect hiding spot for this giant worm to grow into.

That's reason #1 I don't want to use PVC. Yes, it's also bulky.
 

halmus

Registered Users
M.A.S.C Club Member
ex-officio
quackenbush;673231 said:
I believe Gonzo is a Reef Breeders guy but not sure what models he uses...

Edit: Scratch that, he's ReefBrite.
I ended up going with 24" Reefbreeders Photon v2 for the QT tanks. I got some good feedback on them from RC. They fit all of the goals I had in mind for coverage, spectrum, price...

I'll still be going with a different fixture for the display, but I'm looking forward to trying out the Photons. The second shipment arrives tomorrow. I might be able to fire them up this weekend.
 

halmus

Registered Users
M.A.S.C Club Member
ex-officio
Test.....


I finally had it with photobucket today. It's been horrible for years, but I have been too busy to find another solution for photo hosting. I'm trying something else, so here it goes:


halmus

Registered Users
M.A.S.C Club Member
ex-officio
So, I finished the water station. I did a leak test on that and confirmed that all of the pumps do what I was hoping. There was some question as to whether they could handle the head pressure to pump up into those overhead racks. They get the job done.

This was a quick picture I took before I made a water resistant cover for the transformer running the pressure pump.


halmus

Registered Users
M.A.S.C Club Member
ex-officio
So I didn't know there was a major problem with Photobucket other than the fact that it was extremely painful to use. Obviously, all of the previous photographic documentation for this thread is gone. Unless I pay Photobucket's ransom price to recover them. I'm not opposed to paying for a service. However, I posted all of the pictures under an agreement with them and they've evidently decided to change that agreement. It would be less painful if they would have told their users, "effective immediately, we will not support 3rd party hosting for future photos unless you subscribe to our service".

I'll try to keep everyone updated here, but it feels like trying to put a new coat of paint on a car that was just run over by a train.
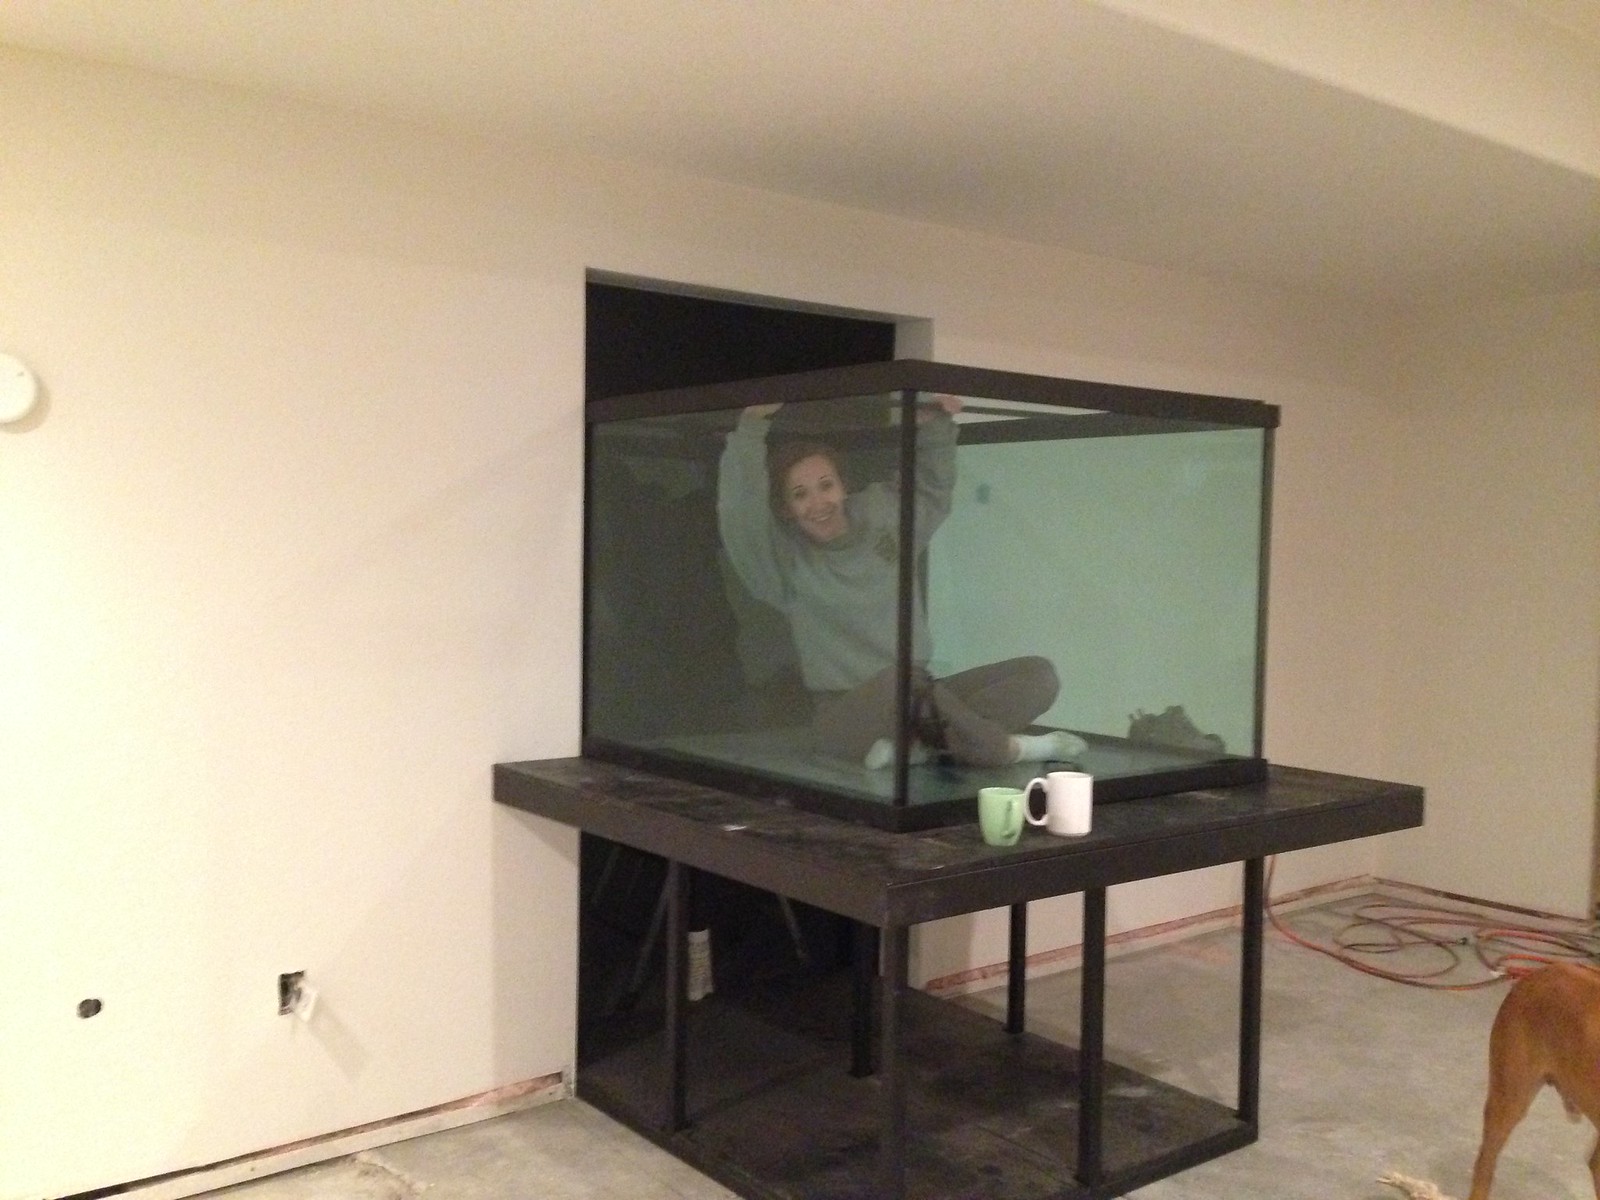
--------------------

Back to the build.

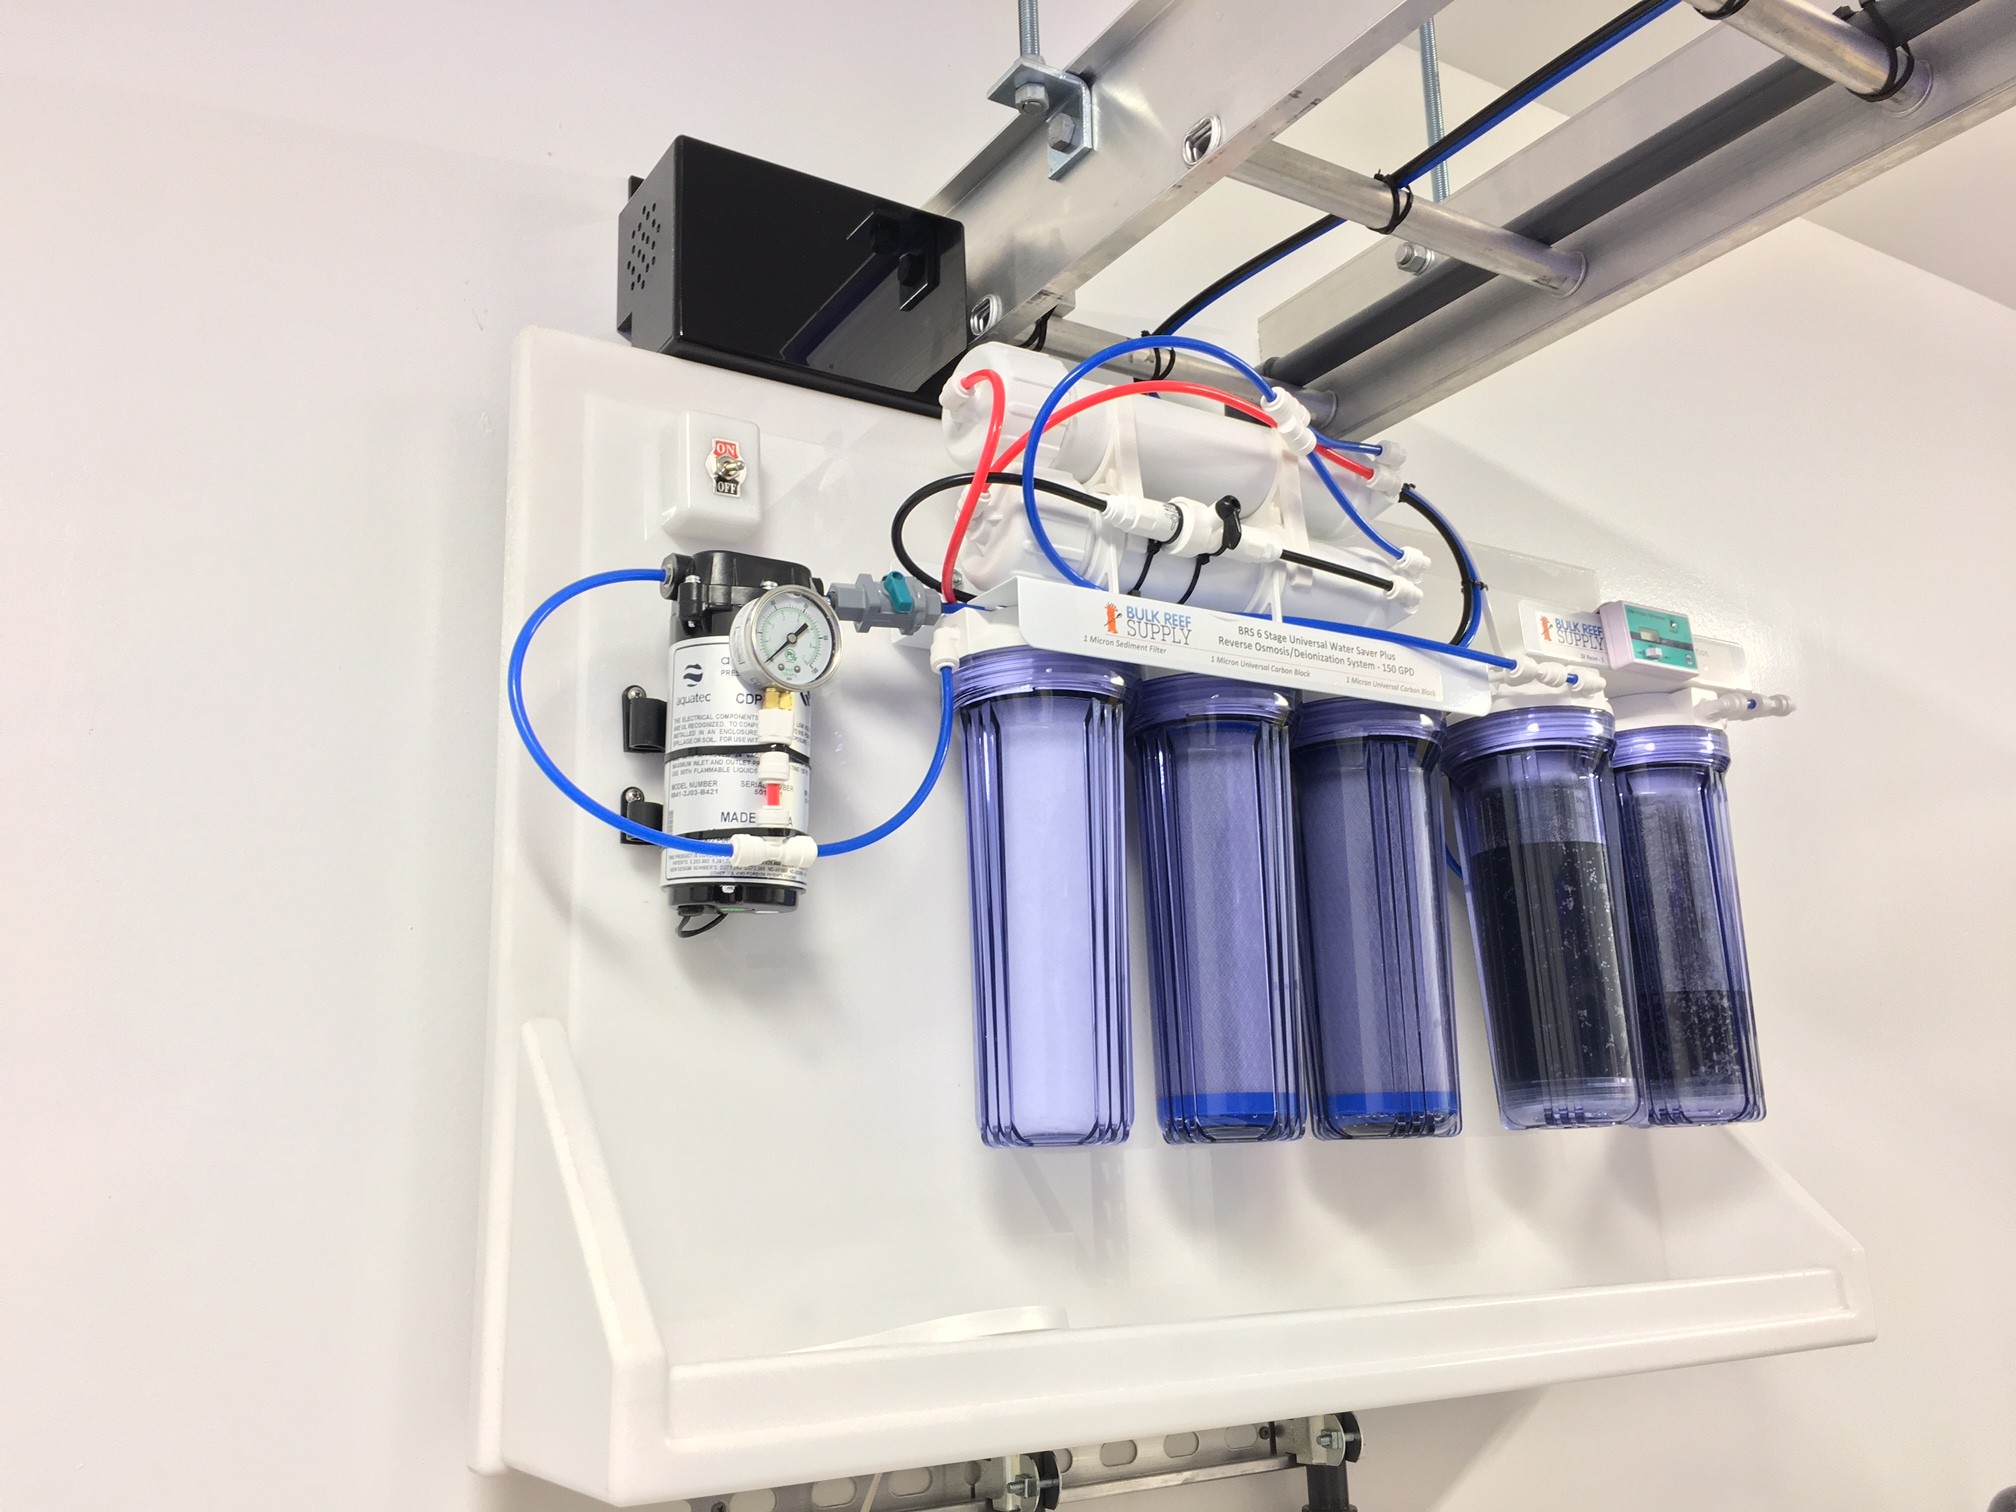
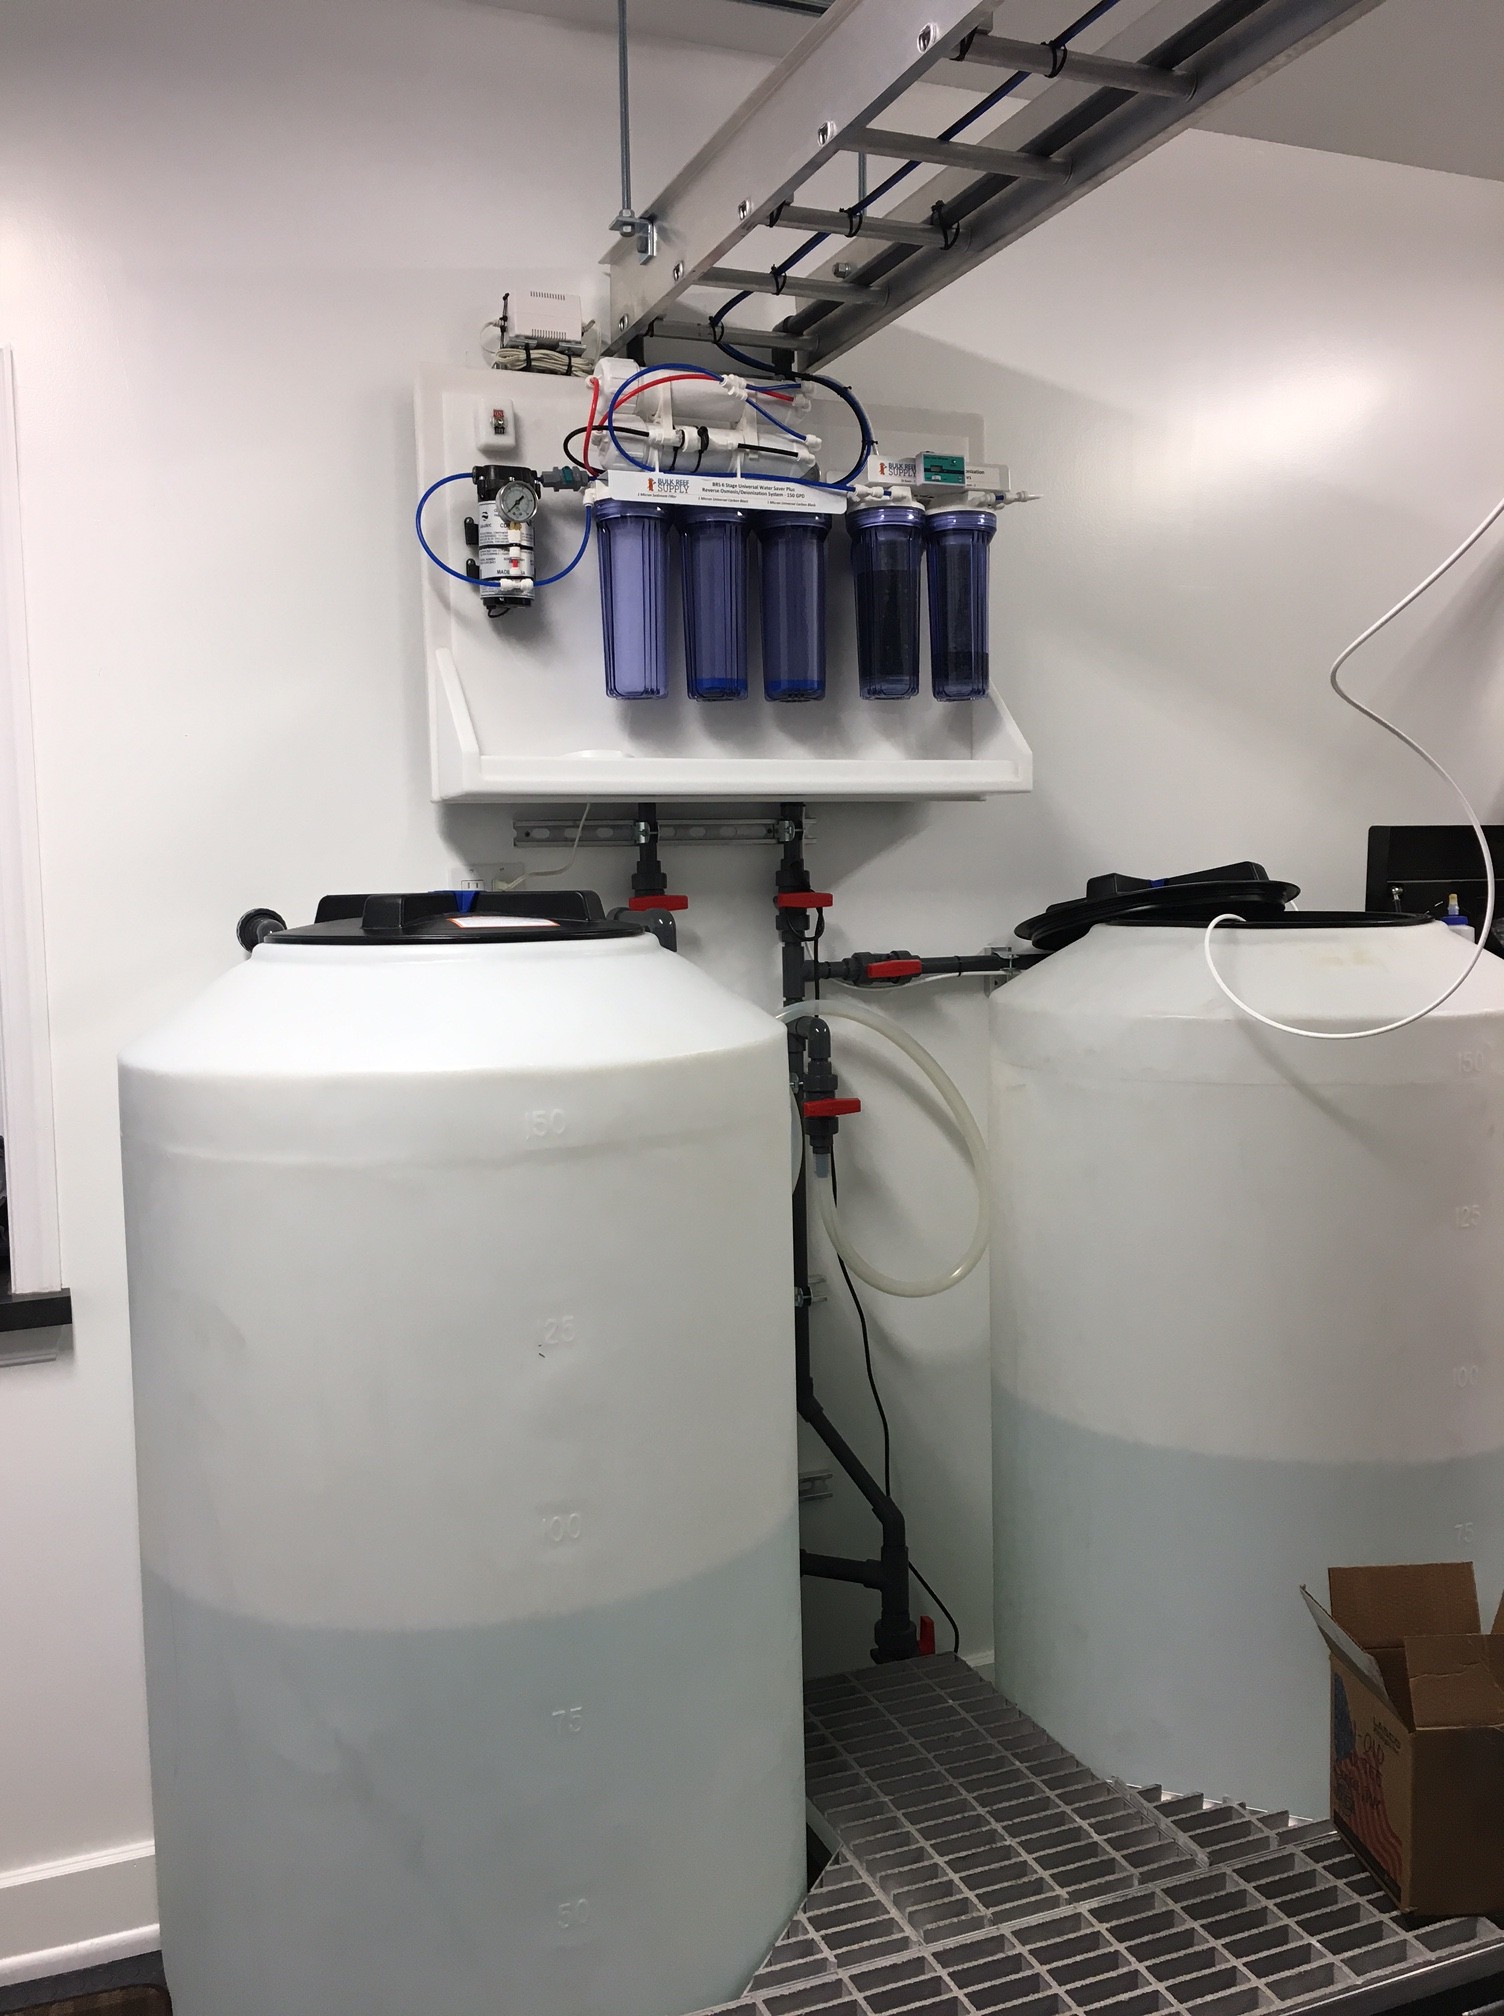
I took quite a few pictures after basically finishing the plumbing. I don't have access to those now. I did a major cleaning of the fish room and my shop. I have most of the parts I'll need for the light rack. That's the next big hurdle.

I hope to find a good solution for photos in the near future.
 

Etoimos

Clown Fish
M.A.S.C Club Member
Yeah, PB has been a pain for mean years. Now they are just about making them selves obsolete by not allowing images to be displayed on other sites... that's what 99% of the people used it for.
 

halmus

Registered Users
M.A.S.C Club Member
ex-officio
Andrew_bram;n673836 said:
Is this thing ready for pee yet!!!!

Sent from my MHA-L29 using Tapatalk
:) One step closer. I finished the plumbing. I have been collecting everything to build the light rack. Then, build the rockwork. Then, pee-party!

First, my OCD is forcing me to start the thread over due to the photo junk. I'm doing the mother of all photo-dumps and then I'll be back on track. Starting to build the light rack tomorrow morning. I got 2 hours of sleep last night due to work. I'm not fit to operate saws right now. So, it's a good time to migrate and re-post pics.
 

Etoimos

Clown Fish
M.A.S.C Club Member
I might have missed it before, but what was the reason for skinning some of the fish room tanks in white acrylic? Was it just for aesthetics?
 

halmus

Registered Users
M.A.S.C Club Member
ex-officio
Oberst Hajj;n674208 said:
I might have missed it before, but what was the reason for skinning some of the fish room tanks in white acrylic? Was it just for aesthetics?

That's a good question. Yes, a big part of it was aesthetics. I like the look externally, and it covers up the fact that I had runs with the solvent while building or modifying all of the internal acrylic. Also, I overlapped as many of the joints as possible while doing this, which means I have that much extra support on the joints. And, the extra 1/4" thickness adds that much more support. It was a lot of extra work, but I want to be completely confident I won't be blowing seams down the road.
 
Top