
200G Forever And A Day Build Thread
- Thread starter Walter White
- Start date
Dude....that's Awesome! 3 things: 1.) Back to t hf e drawing board for me as you gave me some great ideas for my build. 2.) To take the time to "learn a new trade in welding" is awesone! 3.) I don't feel so bad that many of my friends on here call me slow and sometimes old (Cindy/fins up) for taking now a year on my build and all I gave to show is the electrical is almost done. When you're four years into your build! A+ my friend A+!!!
Sent from my SCH-I545 using Tapatalk
Sent from my SCH-I545 using Tapatalk
ThunderTwonk;287779 said:
Coming from the guy with the nicest system in Colorado , I take this as a real compliment. Thanks for all the nice words everyone. It's definitely the motivation and encouragement I need to finally finish this thing.
")
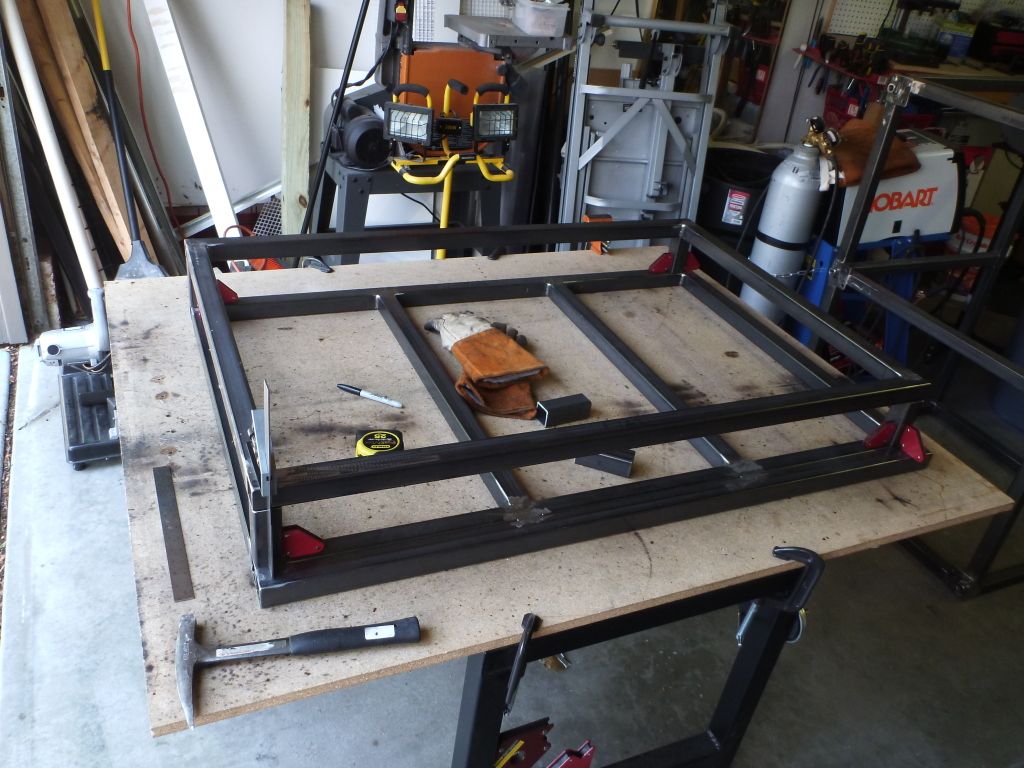
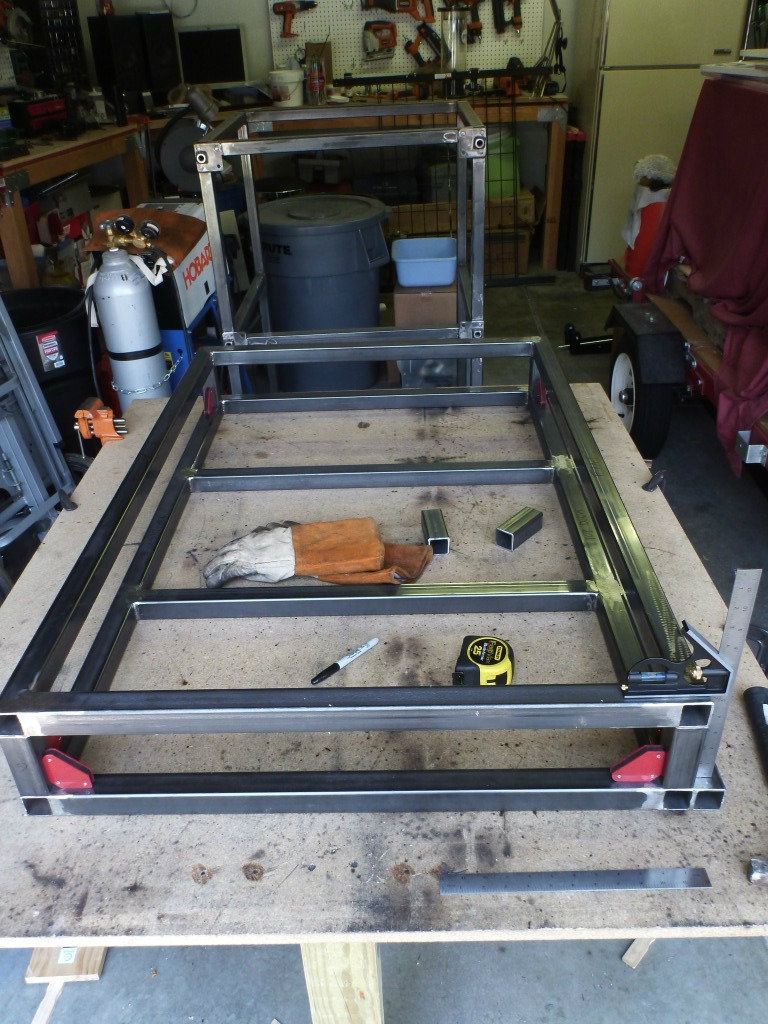
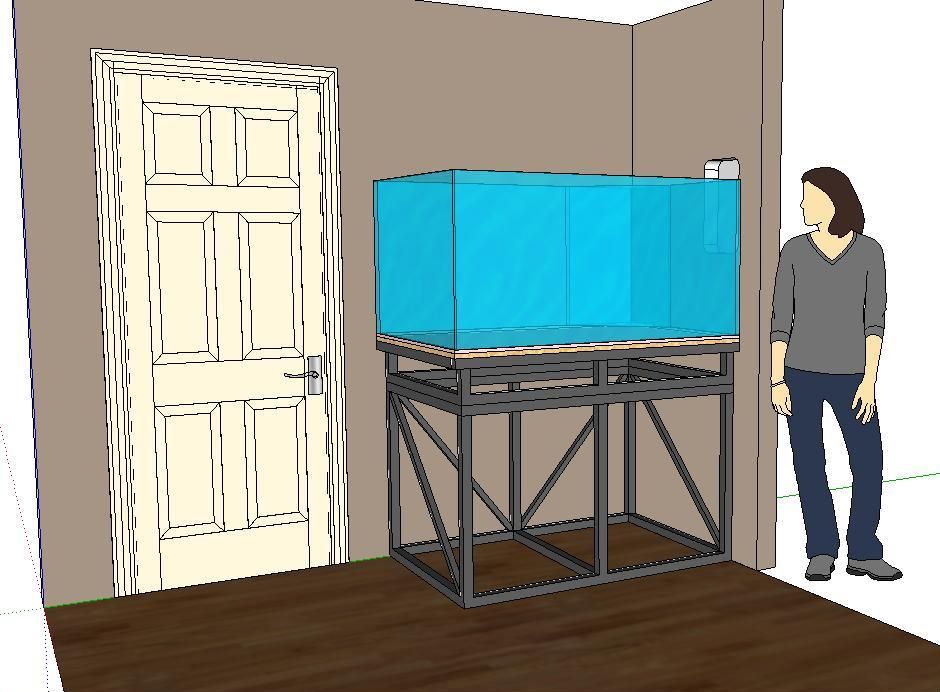
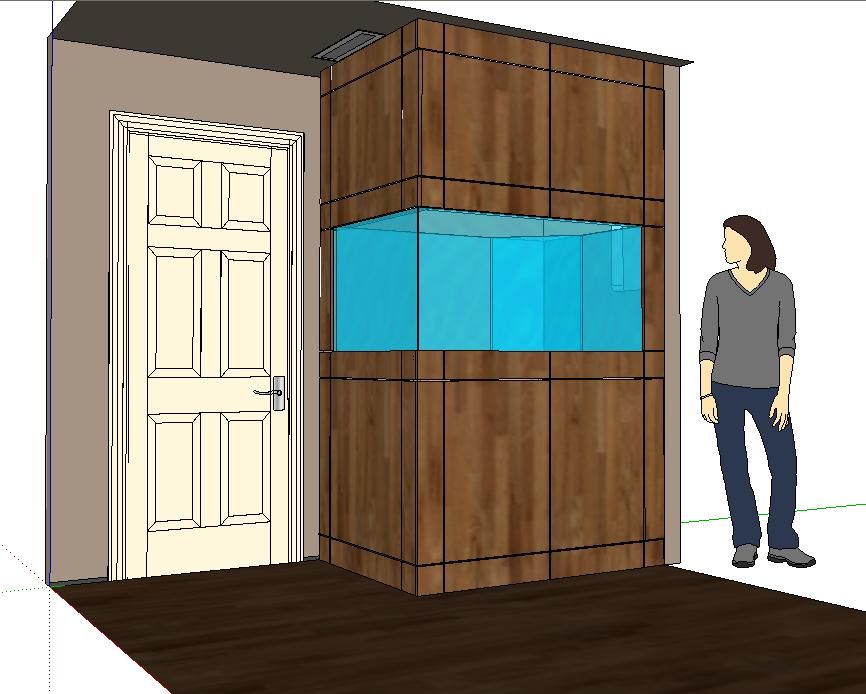
Originally I had planned on pretty much just making two segments like cutting the stand in half horizontally so that the top piece was about the same height as the bottom but then realized that this was going to create an access problem. By keeping the two pieces the same size I would only be leaving a couple 15"x23" holes to climb through for plumbing and other maintenance down the road. It's probably possible that I could fit through that crawling on my belly but I'm a fairly large guy at 6',3" and 200lbs and that just didn't sound very pleasant.
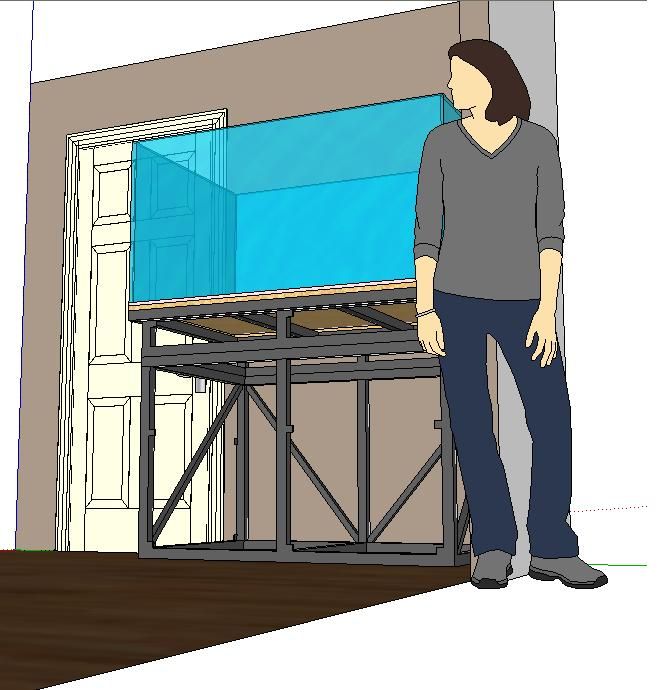
So I ended up making the top piece what I call the "deck" only 7" in total height so that access under the tank would be much easier. Unfortunately I did wind up with not what I would call a design flaw but more of an oversight. I had always pretty much figured I would surround the steel frame with a 2"x4" wood frame as I figured this would be easier to mount my finish panels to. It never really occurred to me that magnets in the finished panels would just be so much simpler. So what you will see is that I built the "deck" to accommodate the offset of the 1.5" thickness of a standard 2"x4". Oh well! not redoing in now. lol

So I ended up making the top piece what I call the "deck" only 7" in total height so that access under the tank would be much easier. Unfortunately I did wind up with not what I would call a design flaw but more of an oversight. I had always pretty much figured I would surround the steel frame with a 2"x4" wood frame as I figured this would be easier to mount my finish panels to. It never really occurred to me that magnets in the finished panels would just be so much simpler. So what you will see is that I built the "deck" to accommodate the offset of the 1.5" thickness of a standard 2"x4". Oh well! not redoing in now. lol
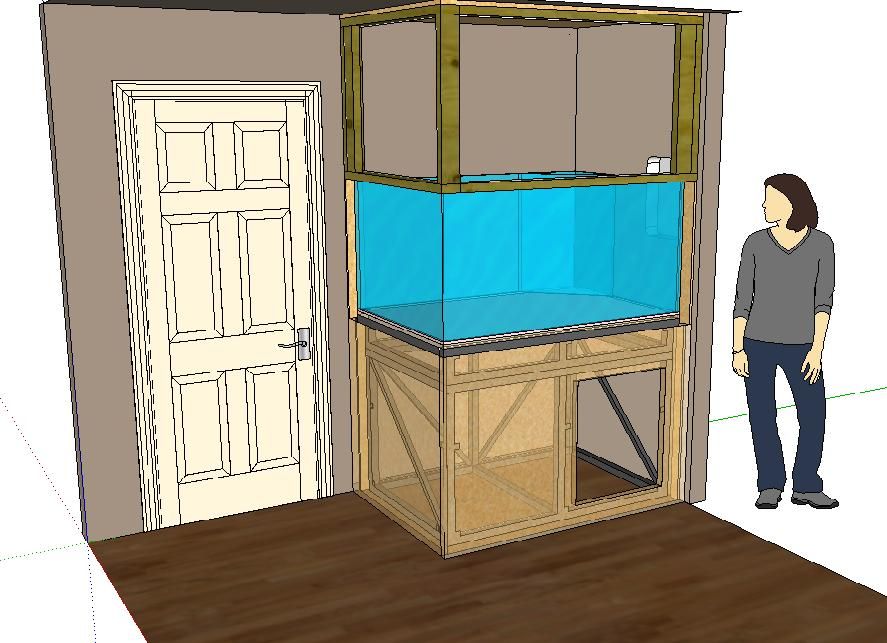
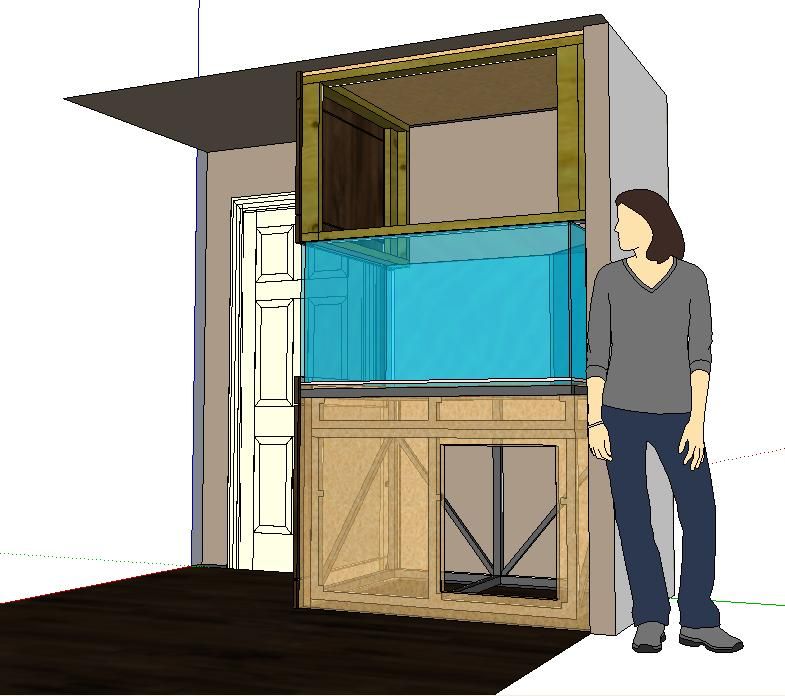
So one weekend on call and stuck at my computer I had allot of time on my hands waiting around for my phone to ring and decided to work on my tank the only way I could. So I virtually (in the literal sense) built my display tank all trimmed out. I was not sure how the whole thing was going to go together as far as panels, hinges, mounting tabs, measurements etc. So I figured hey why not just make a 3D blue print. Now I have all the measurements and could foresee any possible issues in my plan.

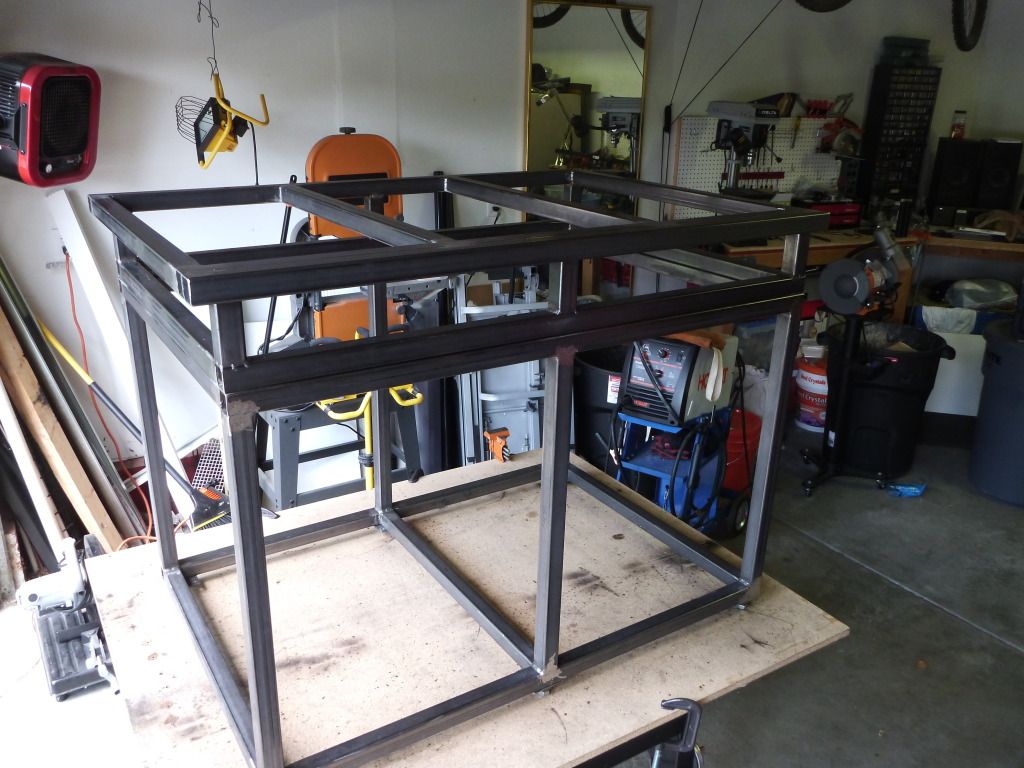
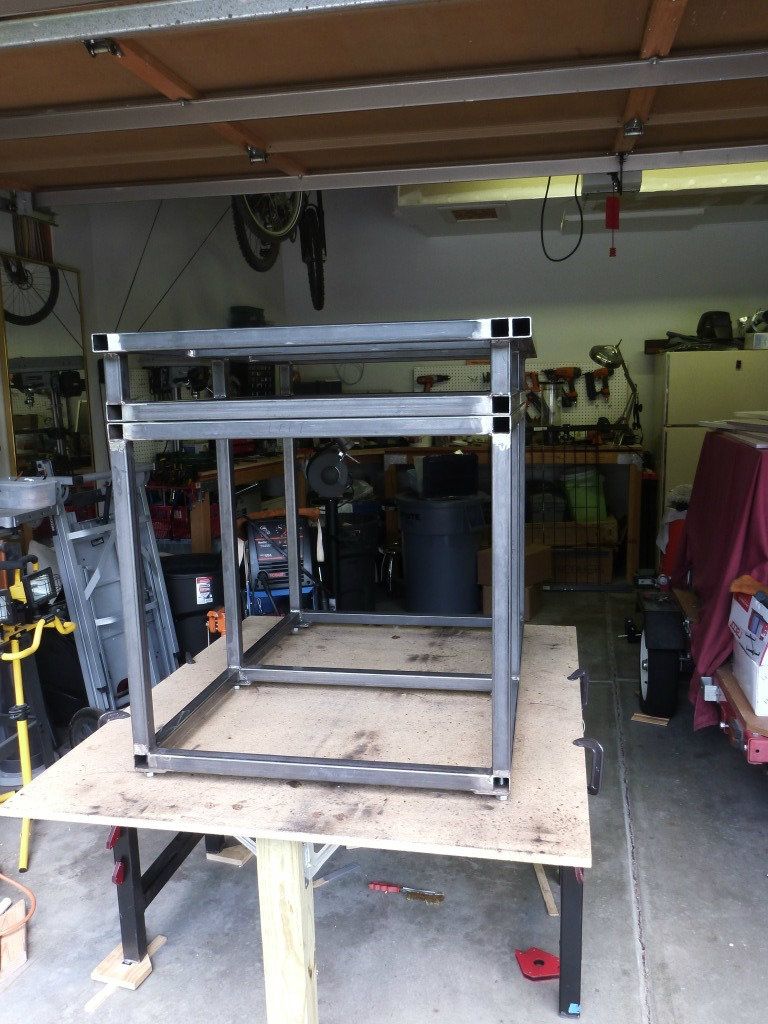
At this point the next step was having the floors refinished. After that I was able to finish the stand which was already pretty much complete except for the mounting tabs. I just wasn't sure where I needed to put them but now that I had my mockups, felt like I had it figured out.

At this point the next step was having the floors refinished. After that I was able to finish the stand which was already pretty much complete except for the mounting tabs. I just wasn't sure where I needed to put them but now that I had my mockups, felt like I had it figured out.
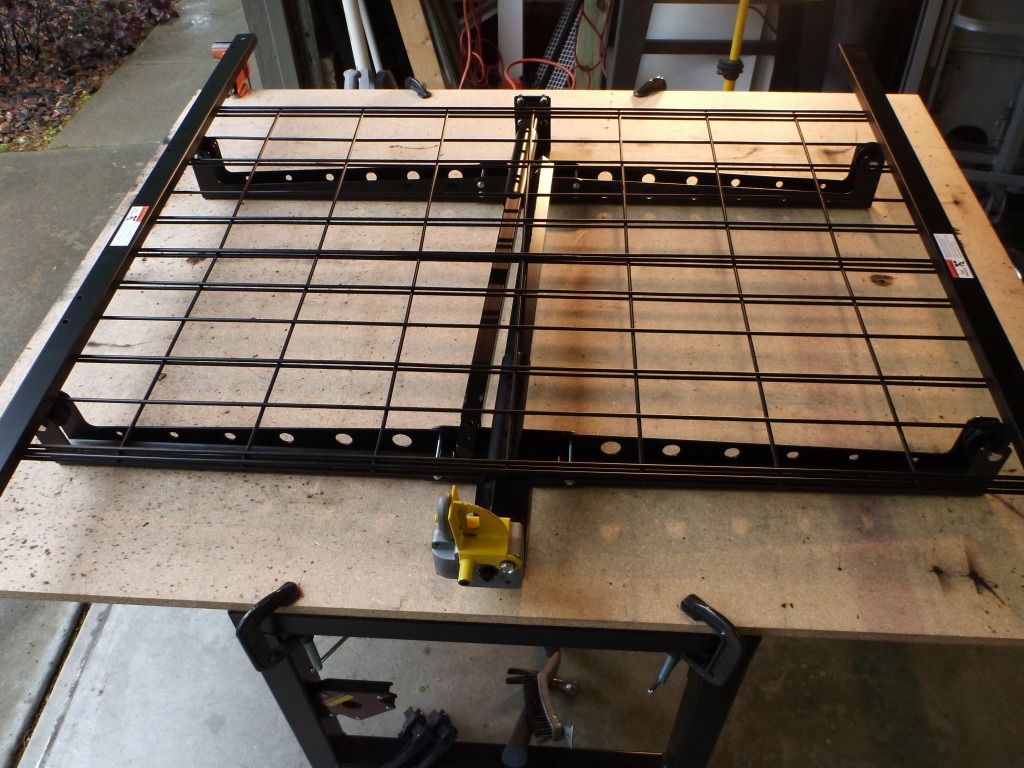
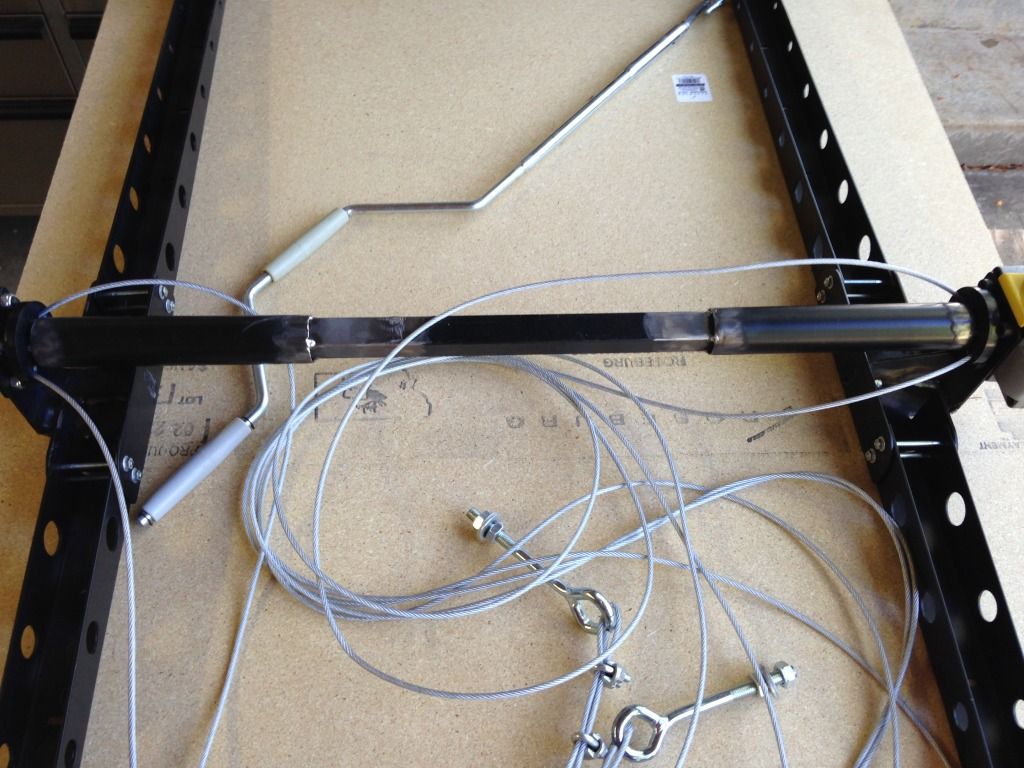
On another front I had also started building my adjustable light rack. I found this unit on line and thought I could modify it to fit my needs. The foot print however is 4'x4' which it too large to fit in the cabinetry above the tank so some pretty serious modification was going to take place. But at the end I should have a unit that I can easily hoist out of the way for cleaning and maintenance as well as adjusting the height of the lights. For now I'm going to leave it manually operated but if I can find a motor i can integrate I will definitely go that route.
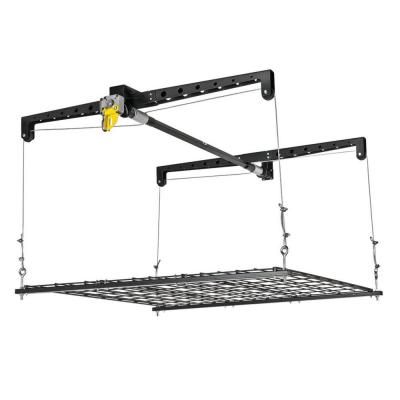
HeavyLift Storage Platform-PHL-1R at The Home Depot
I had to lay out the pieces to see what needs to be cut and where would be the best places to make the modifications.
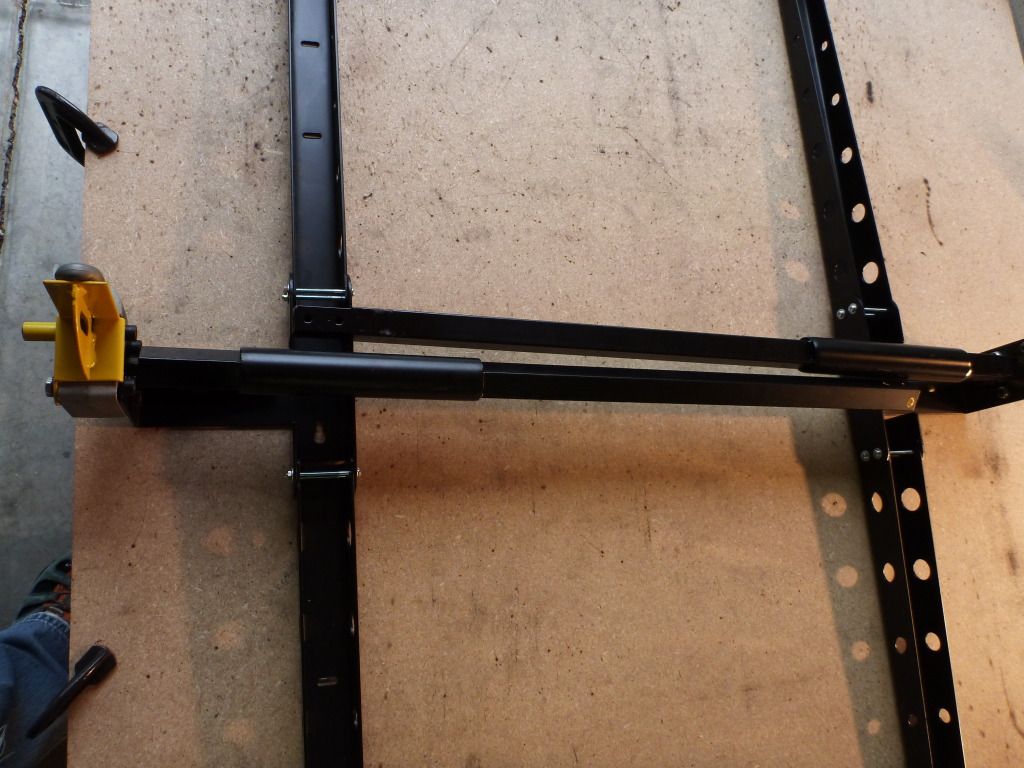
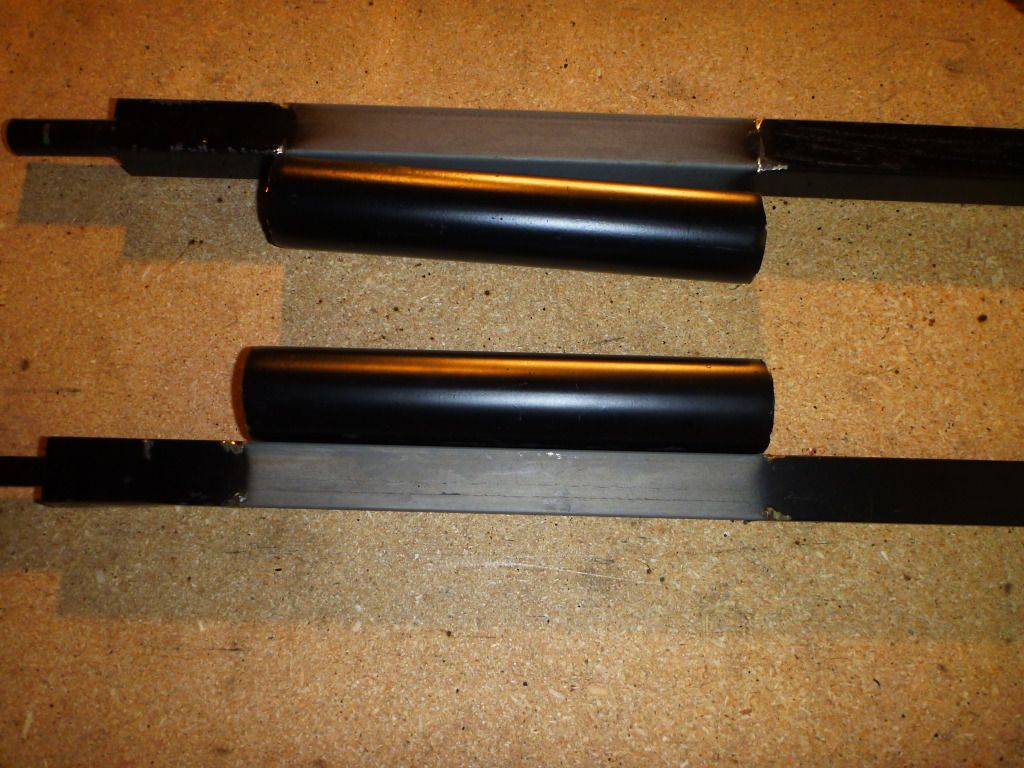
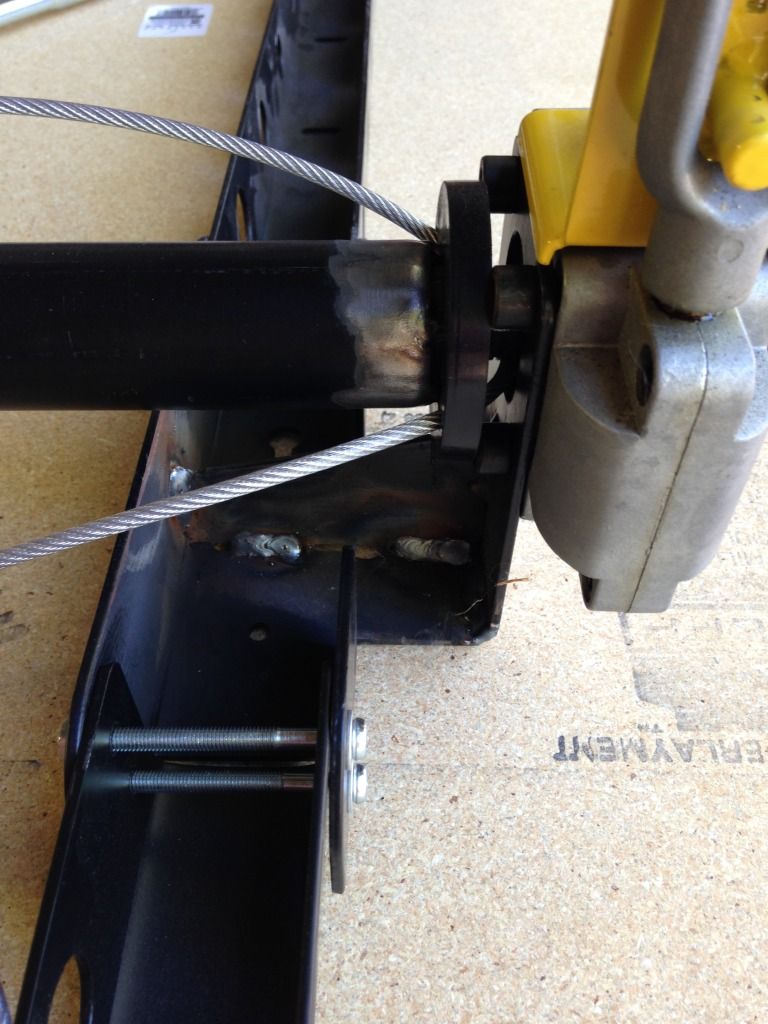
I found I was going to have to cut off the cable rollers as well and slide them up to properly line up with the hanging points on the rack.
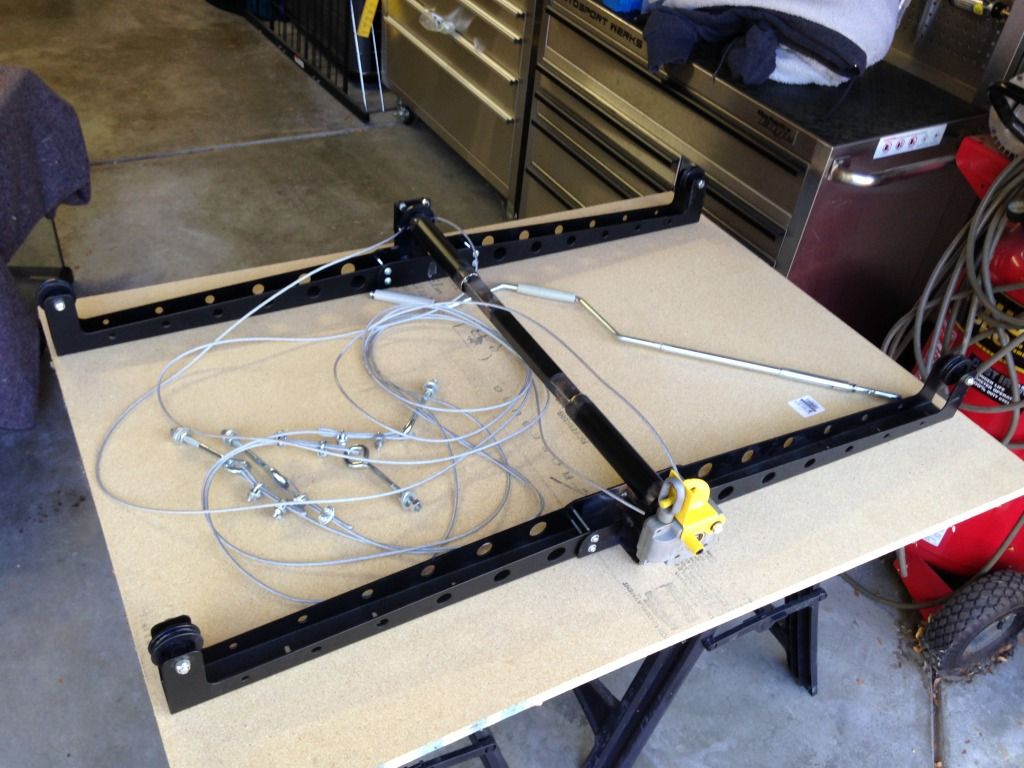
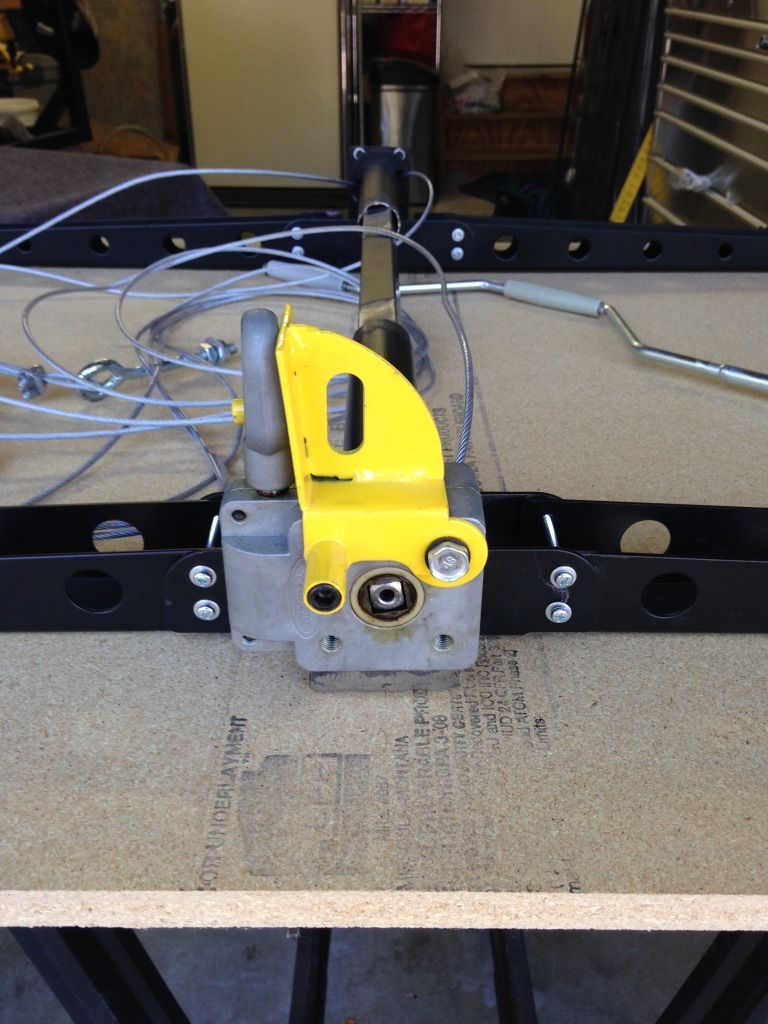
I have a ways to go yet but once its all done Ill take it to get sand blasted and powder coated. The paint that was on it is cheap and easily chips away not to mention the welding will burn allot of it off anyway and I just don't want any rusting. I had to cut it up allot to modify for what I need but I think its going to work really well. Still havent found a motor for it yet but then again havent looked that hard either. In all likly hood Ill just use the hand crank to raise and lower it.
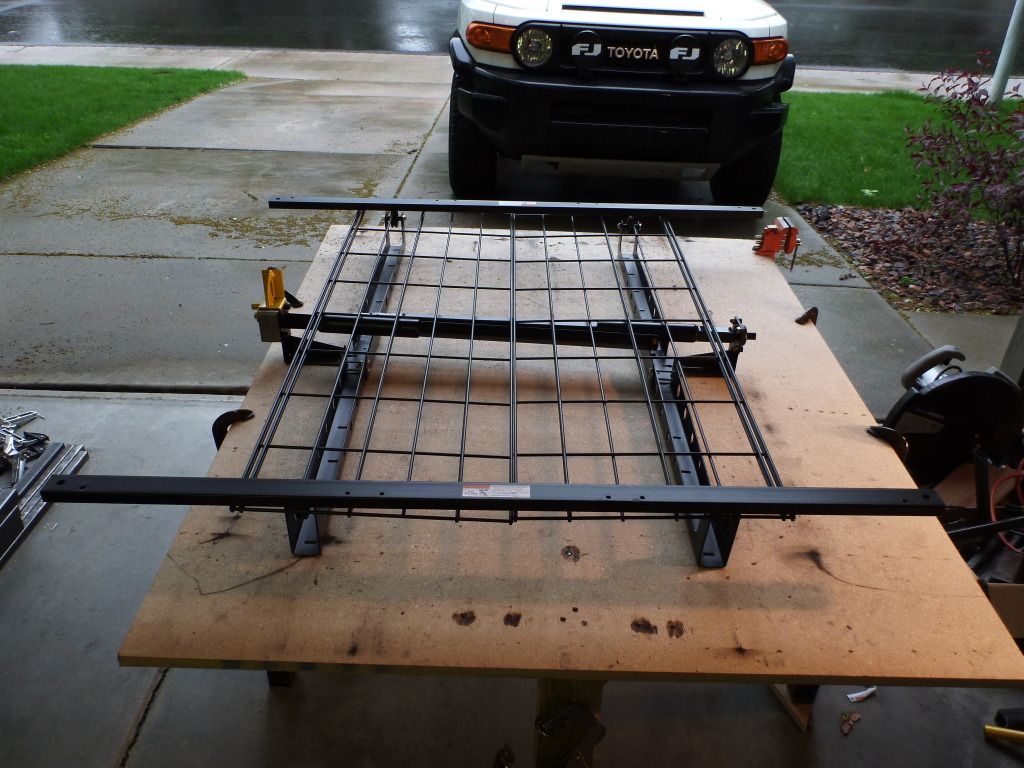
Here it is all assembled with the mods. I just need to get all the parts sand blasted and powder coated.
HeavyLift Storage Platform-PHL-1R at The Home Depot
I had to lay out the pieces to see what needs to be cut and where would be the best places to make the modifications.
I found I was going to have to cut off the cable rollers as well and slide them up to properly line up with the hanging points on the rack.
I have a ways to go yet but once its all done Ill take it to get sand blasted and powder coated. The paint that was on it is cheap and easily chips away not to mention the welding will burn allot of it off anyway and I just don't want any rusting. I had to cut it up allot to modify for what I need but I think its going to work really well. Still havent found a motor for it yet but then again havent looked that hard either. In all likly hood Ill just use the hand crank to raise and lower it.
Here it is all assembled with the mods. I just need to get all the parts sand blasted and powder coated.


As I've been slowly gearing up to start moving on this build again it was time for some new toys.
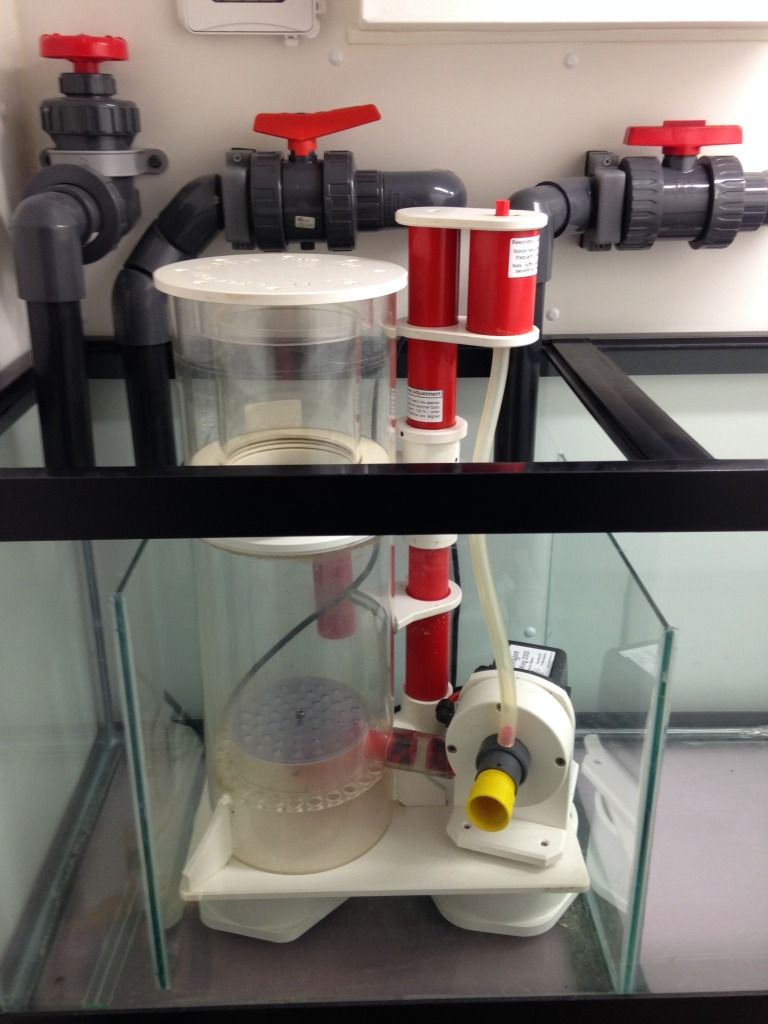
Bubble King SuperMarine 200. Ill need to build a little stand to get it higher above the baffles, but other wise the fit is perfect. Ill probably get a Vertex Alpha cone skimmer for the middle chamber unless I can find a good deal on another matching bubble king.
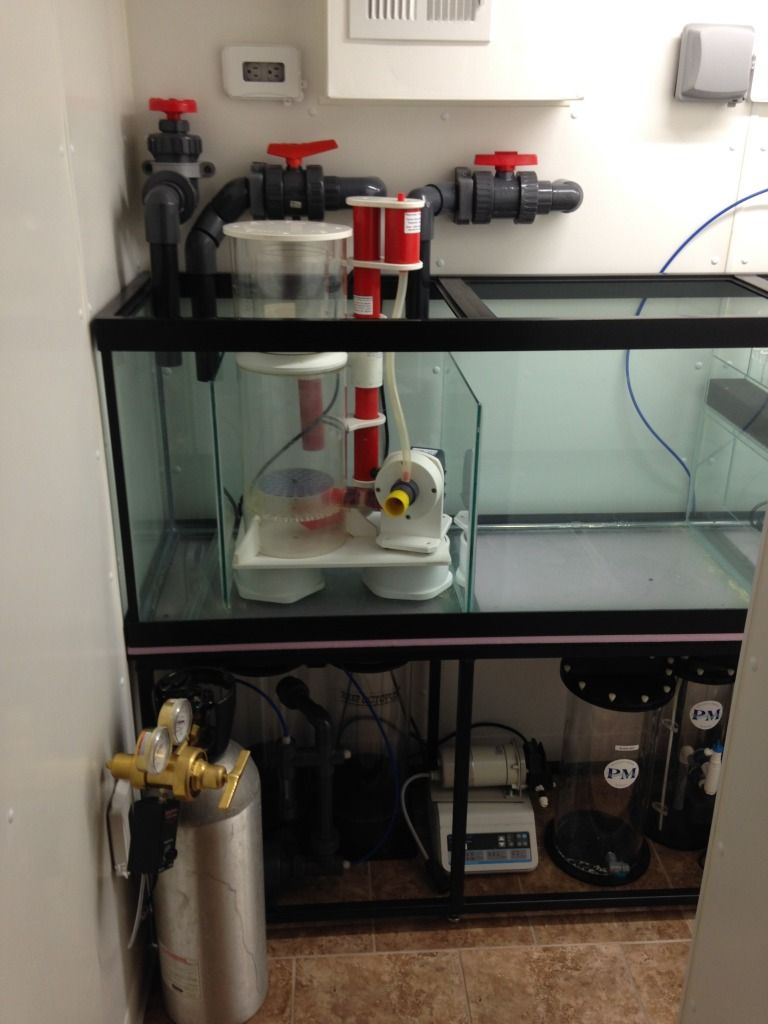
Reef Octopus Dual Chamber Calcium Reactor. This is the big boy rated for 1000 gallons. Way over kill but when I setup this baby for "set and forget" I mean it! Set and forget for a looong time
 .
.
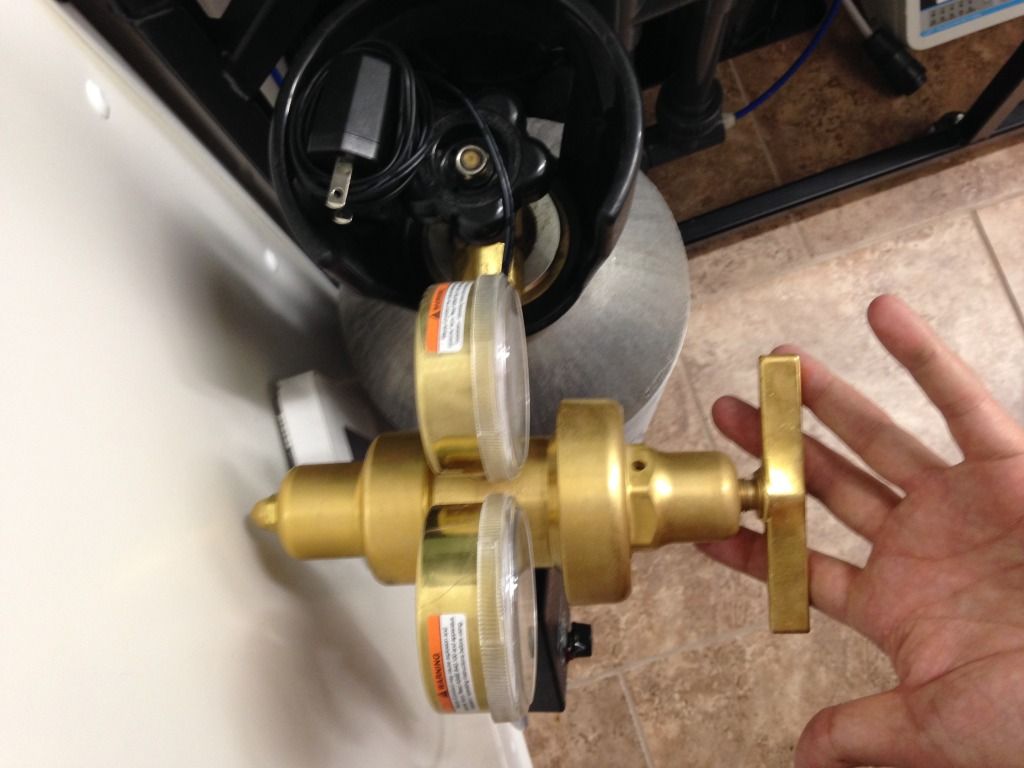
I got a sick Harris CO2 regulator, this thing makes other hobby related regulators look like toys.
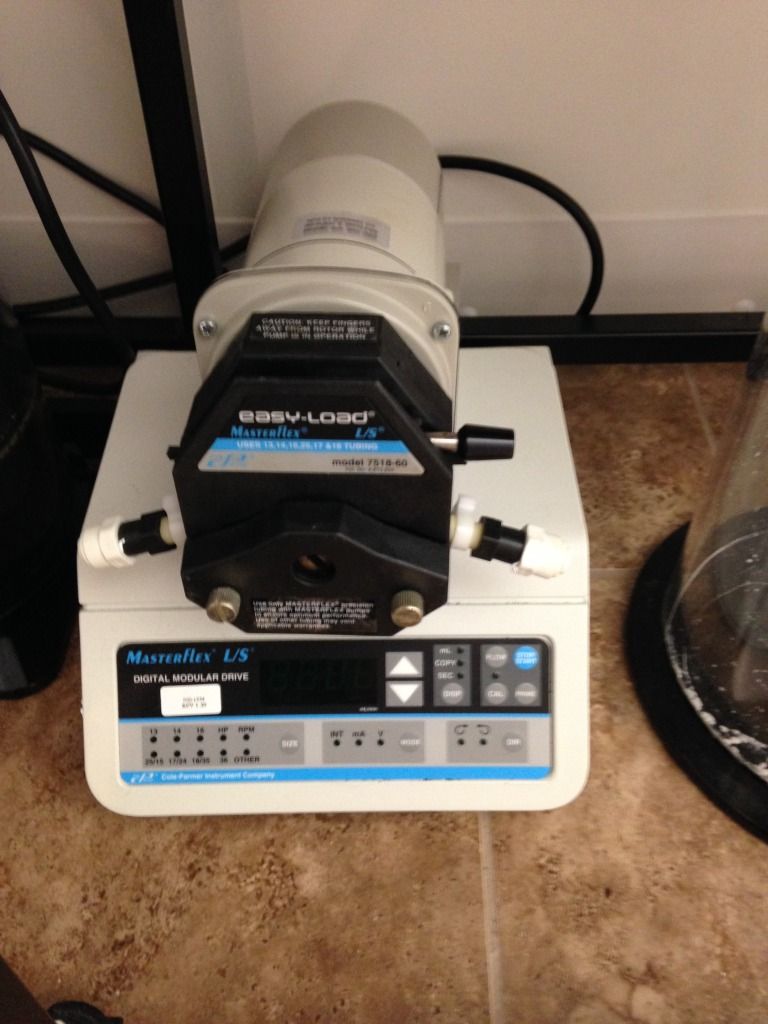
I also got a digital bubble counter and MasterFlex medical grade peristaltic pump to control the effluent. This CA reactor should be as rock solid as I can possible get not to mention super easy to adjust. When ever I need to up the effluent I'll simply need to use the digital control on the Masterflex driver to increase or decrease the effluent.

This regulator is built like a Mac truck. Its huge.
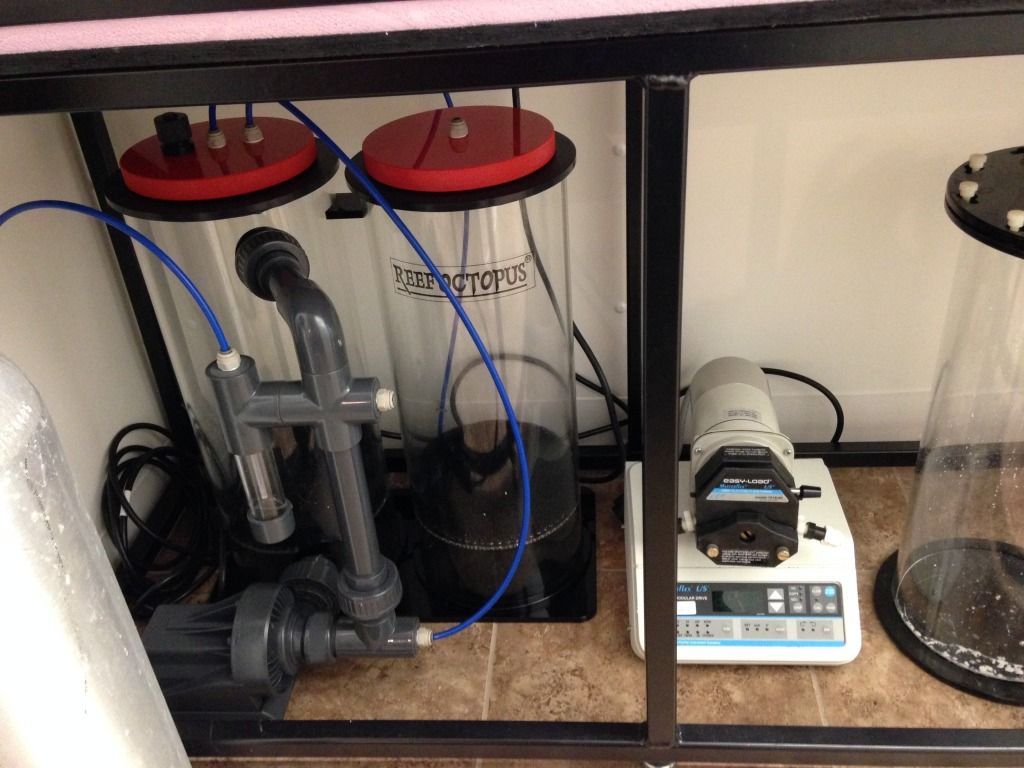
Again this peristaltic pump makes everything else hobby grade look like a toy. But with a 100% duty cycle, ultra precision, and no effect on head pressure if I clean the reactor, change the media, or as the media dissolves it now seems like the only way to go.
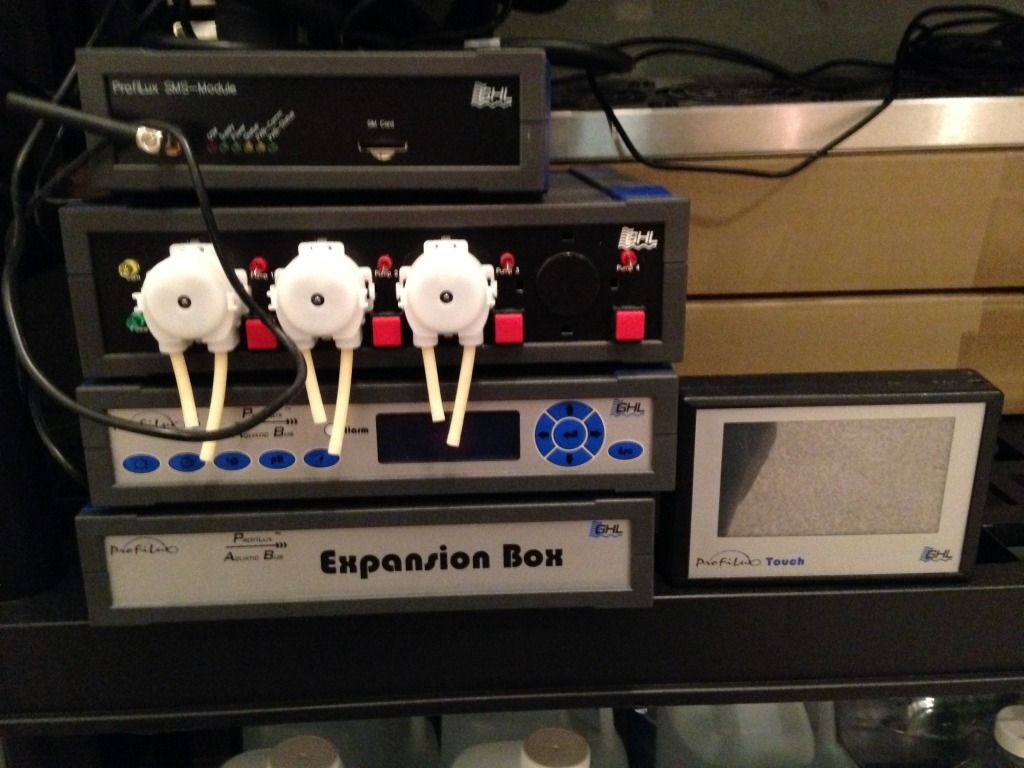
Got my controller as well. I lucked out and got a smoking deal on the complete GHL Profilux line with three PAB power bars, SMS unit, Touch screen display and dosing pumps (should I ever want to dose anything). I also got the expansion box for future upgrades.
This pretty much brings me up to date with where the build is now. So nowI really got to get moving on this thing. Tired of looking at it in the garage. lol
Bubble King SuperMarine 200. Ill need to build a little stand to get it higher above the baffles, but other wise the fit is perfect. Ill probably get a Vertex Alpha cone skimmer for the middle chamber unless I can find a good deal on another matching bubble king.


Reef Octopus Dual Chamber Calcium Reactor. This is the big boy rated for 1000 gallons. Way over kill but when I setup this baby for "set and forget" I mean it! Set and forget for a looong time
I got a sick Harris CO2 regulator, this thing makes other hobby related regulators look like toys.
I also got a digital bubble counter and MasterFlex medical grade peristaltic pump to control the effluent. This CA reactor should be as rock solid as I can possible get not to mention super easy to adjust. When ever I need to up the effluent I'll simply need to use the digital control on the Masterflex driver to increase or decrease the effluent.

This regulator is built like a Mac truck. Its huge.


Again this peristaltic pump makes everything else hobby grade look like a toy. But with a 100% duty cycle, ultra precision, and no effect on head pressure if I clean the reactor, change the media, or as the media dissolves it now seems like the only way to go.

Got my controller as well. I lucked out and got a smoking deal on the complete GHL Profilux line with three PAB power bars, SMS unit, Touch screen display and dosing pumps (should I ever want to dose anything). I also got the expansion box for future upgrades.

This pretty much brings me up to date with where the build is now. So nowI really got to get moving on this thing. Tired of looking at it in the garage. lol
Lol eyes on the chick. It took me a minute to figure it out. Actually that's a dude with some slammin lipstick on. In other news, that setup really is quite impressive. Makes me think i could actually pull something like that off and not blow up my house or chop my right hand off with a power tool. I got dis.