A Golden Reef Tank
- Thread starter halmus
- Start date
")

I'll be glad to show off the tank while it still has virgin rock and the sumps look bright and shiny.
Thanks for the vote of confidence in woodworking.
I used to run a reef club in Washington (only for a year). I had a crazy idea back then but was never able to follow through with it.
I wanted to have a series of club meetings where we:
Month 1: built a stand and hood (woodworking skills)
Month 2: built an acrylic sump (acrylic skills)
Month 3: talked about plumbing and plumbed the tank (the proper way to display your plumber's crack)
Month 4: lighting / heating / electronics (how not to kill yourself with electricity)
Month 5: ....you get the idea...
Month (something): raffle off the tank that the club built at some big meeting. Maybe have equipment donated so it's an awesome plug and play reef.
Then BRS stole my idea and came out with the "52 weeks of reefing" video series which has been great to watch.
The series of meetings was just a way to try to educate people on new skills useful in the hobby. I'm always learning new tricks from people even if I think I've already nailed down the skill.
Unfortunately, I haven't made it to any official meetings and I assume a lot of those topics have been covered in one way or another over the years. I'll definitely be at more meetings once every waking hour isn't spent working at work and/or working at home.
-----------------
Back to the build.
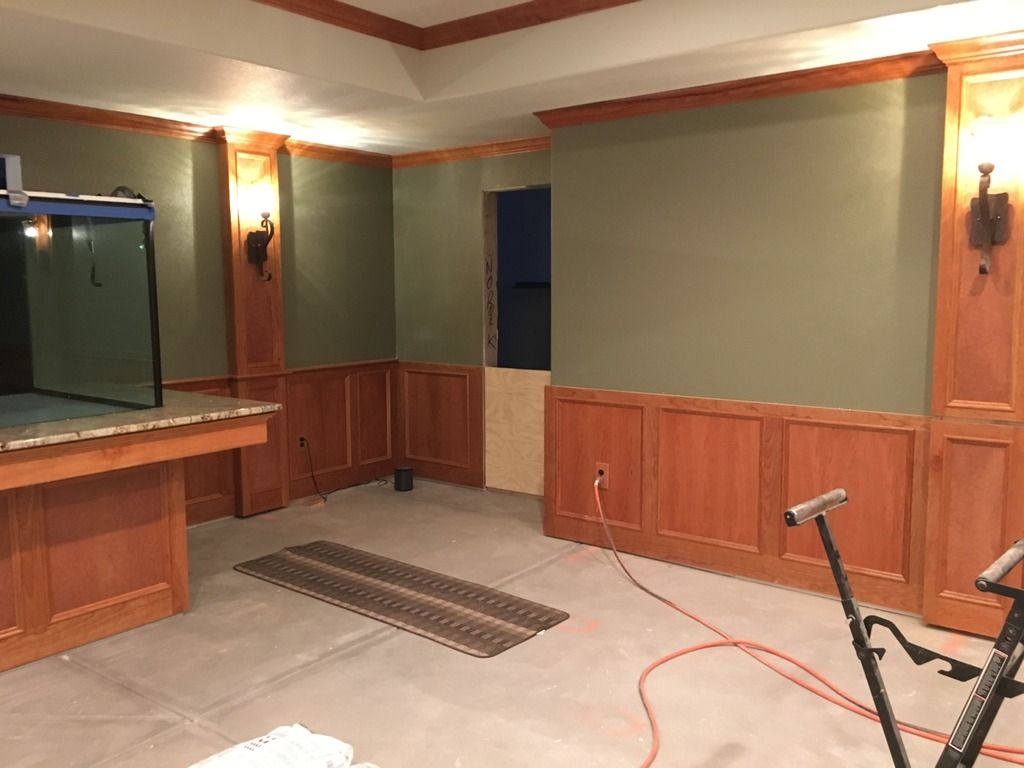
The counters are being installed Friday. Pictures to come with that.
I am finishing the veneer panels this weekend. They are built and just need some poly. Hopefully those can be installed Sunday.
I am spraying a ton of panels tonight and tomorrow night. I'll post up pictures of my temporary spray booth in the garage. I can install those this weekend if my wife and I can come to an agreement on whether the door casing will sit out beyond the paneling or be recessed into it.
Sent from my iPhone using Tapatalk
Thanks for the vote of confidence in woodworking.
I used to run a reef club in Washington (only for a year). I had a crazy idea back then but was never able to follow through with it.
I wanted to have a series of club meetings where we:
Month 1: built a stand and hood (woodworking skills)
Month 2: built an acrylic sump (acrylic skills)
Month 3: talked about plumbing and plumbed the tank (the proper way to display your plumber's crack)
Month 4: lighting / heating / electronics (how not to kill yourself with electricity)
Month 5: ....you get the idea...
Month (something): raffle off the tank that the club built at some big meeting. Maybe have equipment donated so it's an awesome plug and play reef.
Then BRS stole my idea and came out with the "52 weeks of reefing" video series which has been great to watch.
The series of meetings was just a way to try to educate people on new skills useful in the hobby. I'm always learning new tricks from people even if I think I've already nailed down the skill.
Unfortunately, I haven't made it to any official meetings and I assume a lot of those topics have been covered in one way or another over the years. I'll definitely be at more meetings once every waking hour isn't spent working at work and/or working at home.
-----------------
Back to the build.
The counters are being installed Friday. Pictures to come with that.
I am finishing the veneer panels this weekend. They are built and just need some poly. Hopefully those can be installed Sunday.
I am spraying a ton of panels tonight and tomorrow night. I'll post up pictures of my temporary spray booth in the garage. I can install those this weekend if my wife and I can come to an agreement on whether the door casing will sit out beyond the paneling or be recessed into it.
Sent from my iPhone using Tapatalk
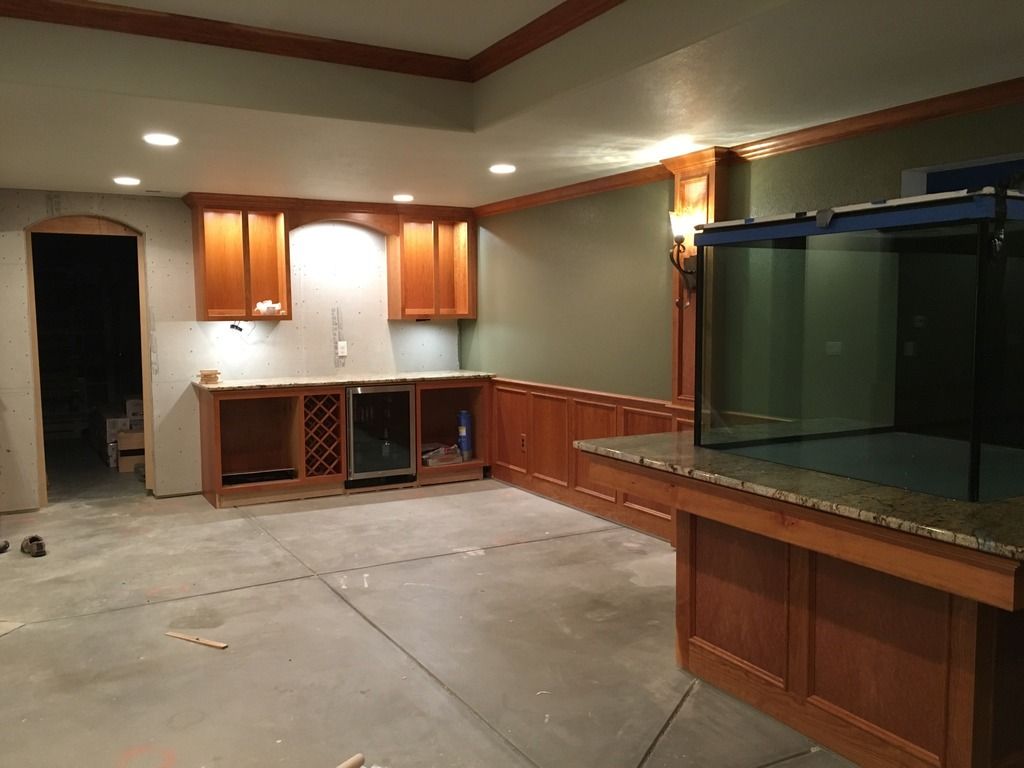
This is my "spray booth" at home. AKA, the wife's garage. The plastic floor rolls up and is lifted up to the ceiling with that back plastic sheet. It's like a sail on a pirate ship.
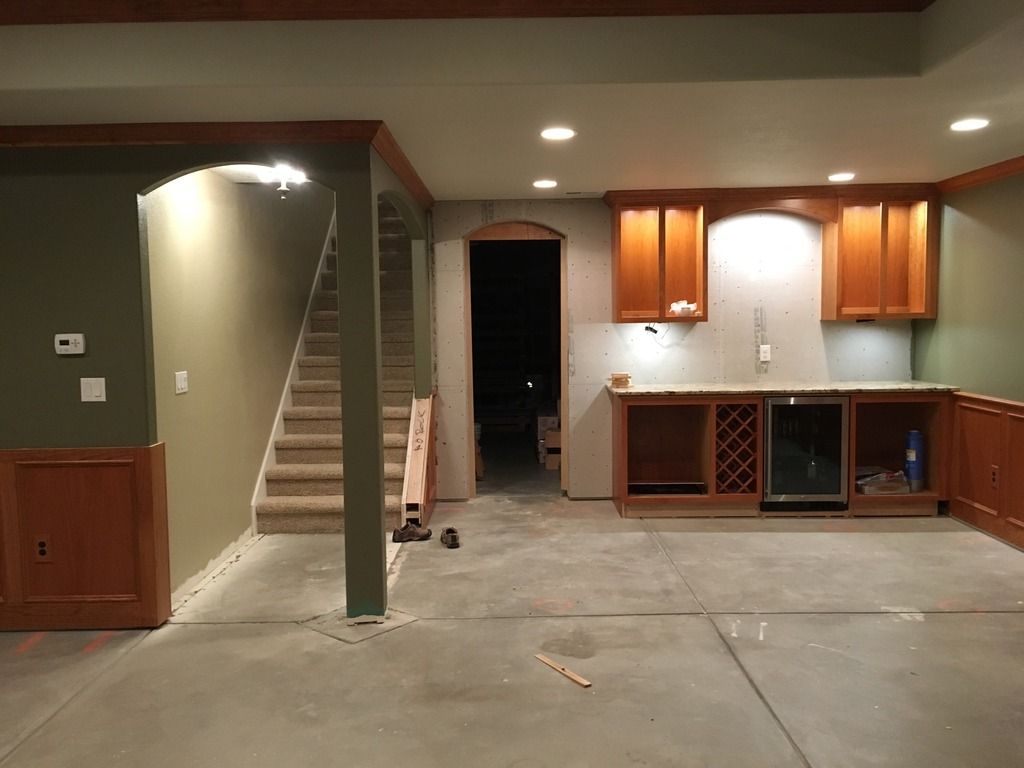
These panels will just about finish out the walls for the basement. There are a few small panels to make before that's done. And, I have drywall to correct to cover up the fact that one of the posts the contractor installed is 1/2" out of square over 9". I have to fill that all in with mud and re-texture before finishing it off.

Sent from my iPhone using Tapatalk
These panels will just about finish out the walls for the basement. There are a few small panels to make before that's done. And, I have drywall to correct to cover up the fact that one of the posts the contractor installed is 1/2" out of square over 9". I have to fill that all in with mud and re-texture before finishing it off.
Sent from my iPhone using Tapatalk
halmus;n655442 said:
I wanted to have a series of club meetings where we:
Month 1: built a stand and hood (woodworking skills)
Month 2: built an acrylic sump (acrylic skills)
Month 3: talked about plumbing and plumbed the tank (the proper way to display your plumber's crack)
Month 4: lighting / heating / electronics (how not to kill yourself with electricity)
Month 5: ....you get the idea...
Month (something): raffle off the tank that the club built at some big meeting. Maybe have equipment donated so it's an awesome plug and play reef.
TheRealChrisBrown;n655556 said:
That's a really cool idea! I think a lot of benefit could come out of that!
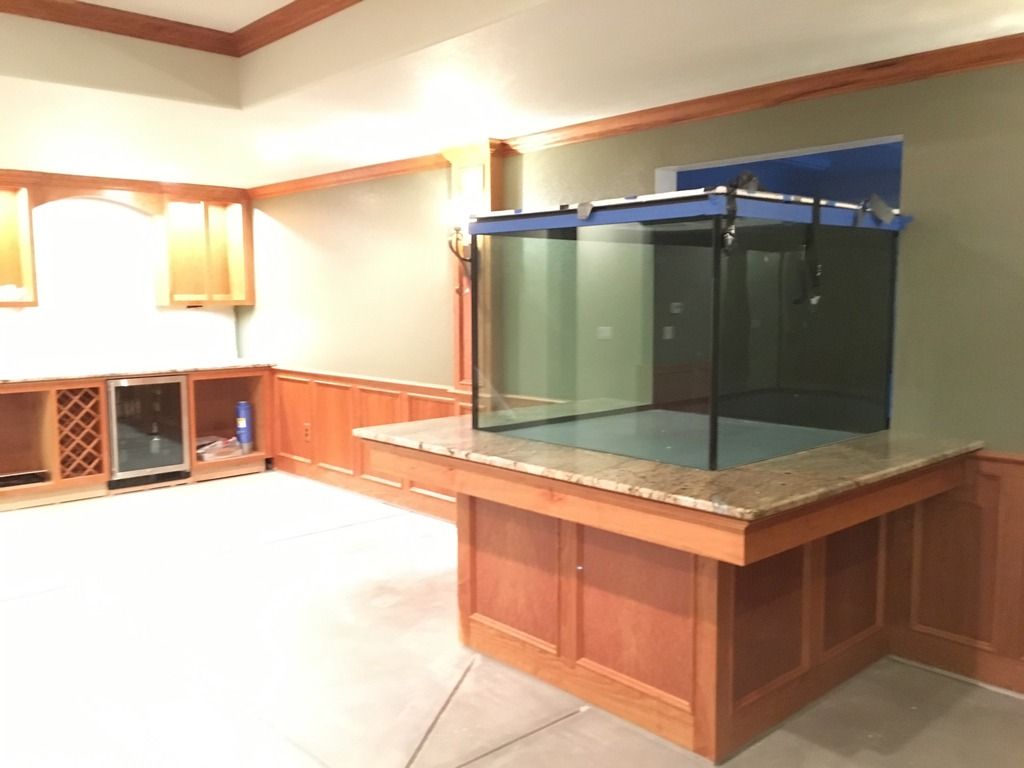
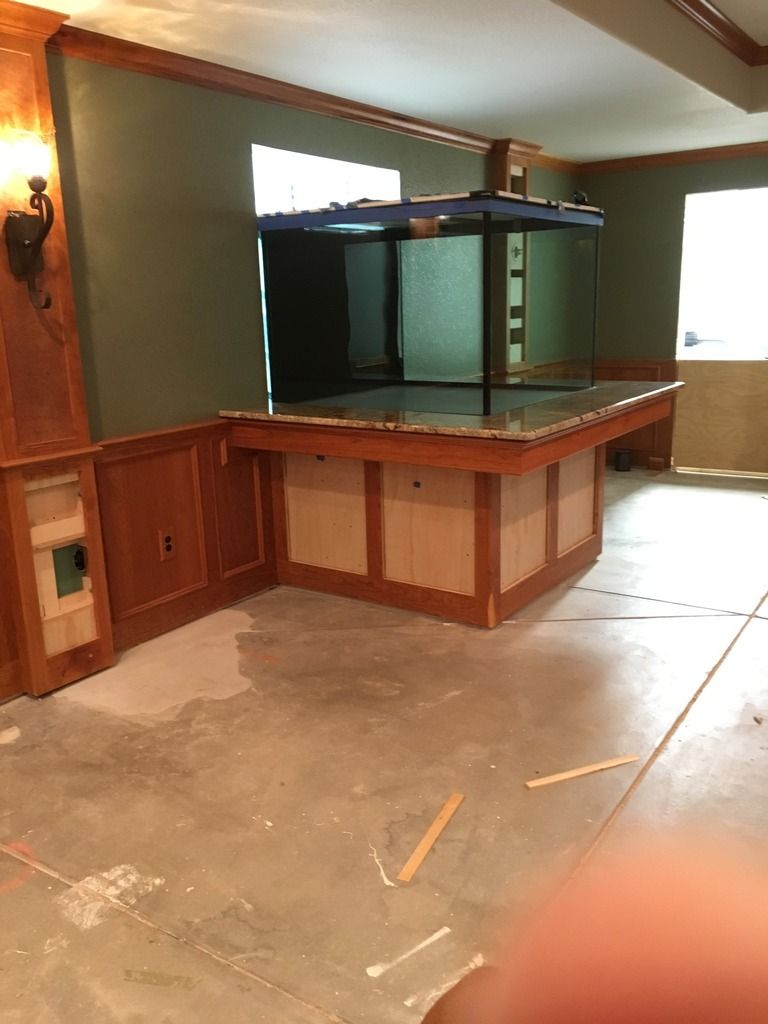
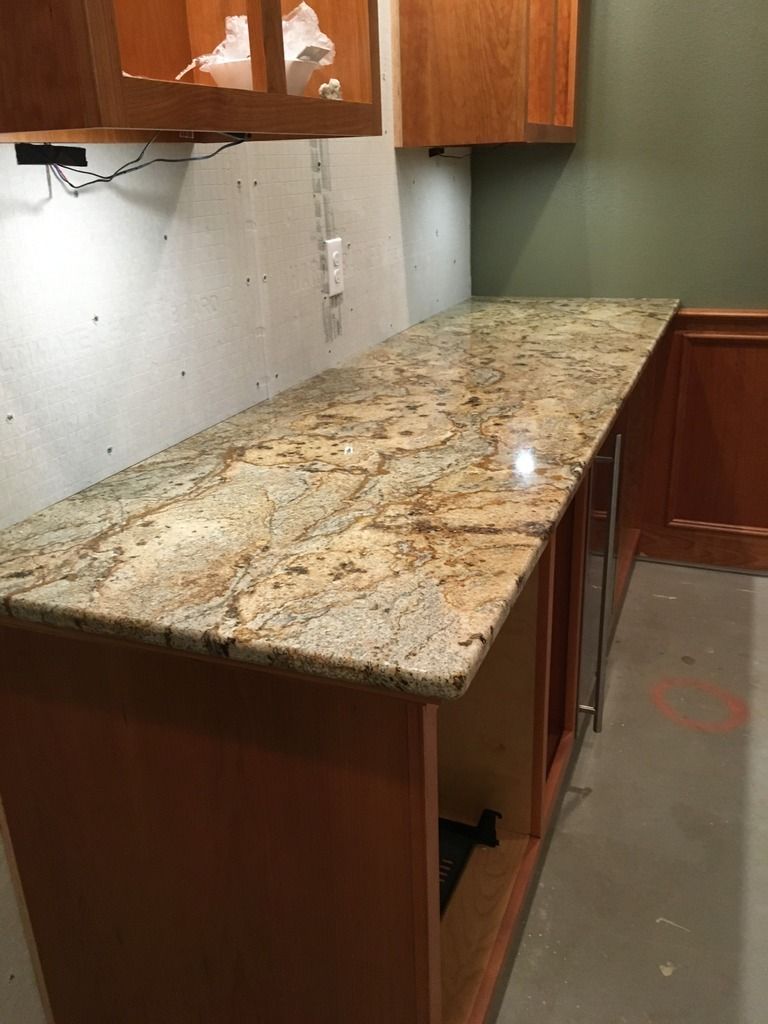
The counters went in today without issue. I had the tank wrapped well. I had visions of them slamming into a glass corner and chipping off a hug chunk. They were great and I'm happy with how it's turned out.
Someone's big fat finger got in the way but that guy is too lazy to crop the picture or take another one.
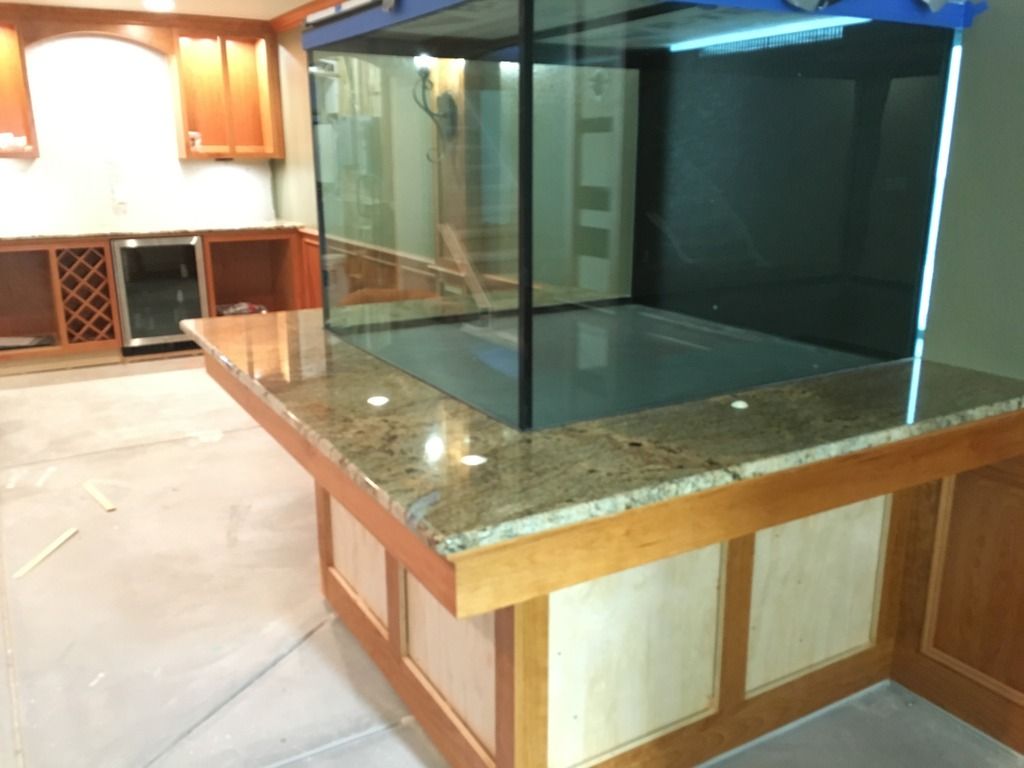
The only bad news is that after spending an entire weekend prepping the veneer panels last week, I'm really unhappy with how they've turned out once the polyurethane went on. They're all the same species of wood but some look awesome and some look like junk up against the cherry. They all look great on their own. I'm just not comfortable putting them into this project. I will probably put cherry panels in everything for now and come back later on. Or, maybe I'll never change them out. I'm tired of setbacks and want to get this tank wet!
Next weekend I might try putting rock on that accent wall. All of the material is on hand. I just need to pick up the mortar.
Dub_G;655719 said:
I just found your build thread and I gotta say I'm very impressed. Can't wait to see how it looks finished!!
SynDen;655724 said:
Very nice man. Good choice in stone, I think that pretty close to the same color we picked for the kitchen remodel
The stone was one of the only decisions in this project my wife and I didn't debate over for weeks on end.
I'm really happy it's in with no damage to the tank.
Sent from my iPhone using Tapatalk
Sctip;n655809 said:
Again absolutely amazing! Cannot wait to see this in person.
-----------------------
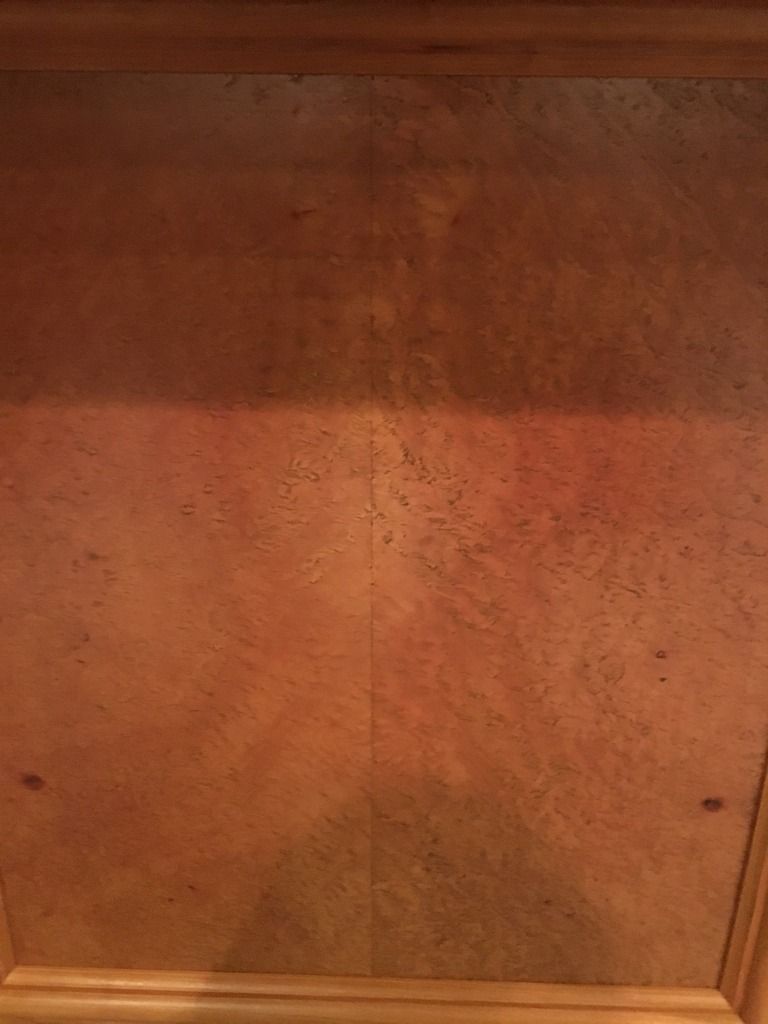
Good news. I think I was able to salvage the Madrone burl veneer panels that I was ready to toss into the junk. They turned out close in tone to the cherry, but too pink, like a pencil eraser. They looked bad (in my mind) because they were close but not close enough. That's the problem with trying to mix woods. It's easier to go with a drastic contrast. I wasn't able to find any true cherry burl veneers, just cherry "crotch". No, I'm not being vulgar, the "crotch" wood doesn't reference the reproductive capabilities of a tree. It's a cut of wood where a branch meets the trunk. It makes for interesting grain (non-linear). But it wasn't what we were looking for.
I was able to put a glaze over the top of the panels followed by another coat of polyurethane. That covered up the pink a little bit and brought out some more brown tones. So, I think those will be going in once they're dry.
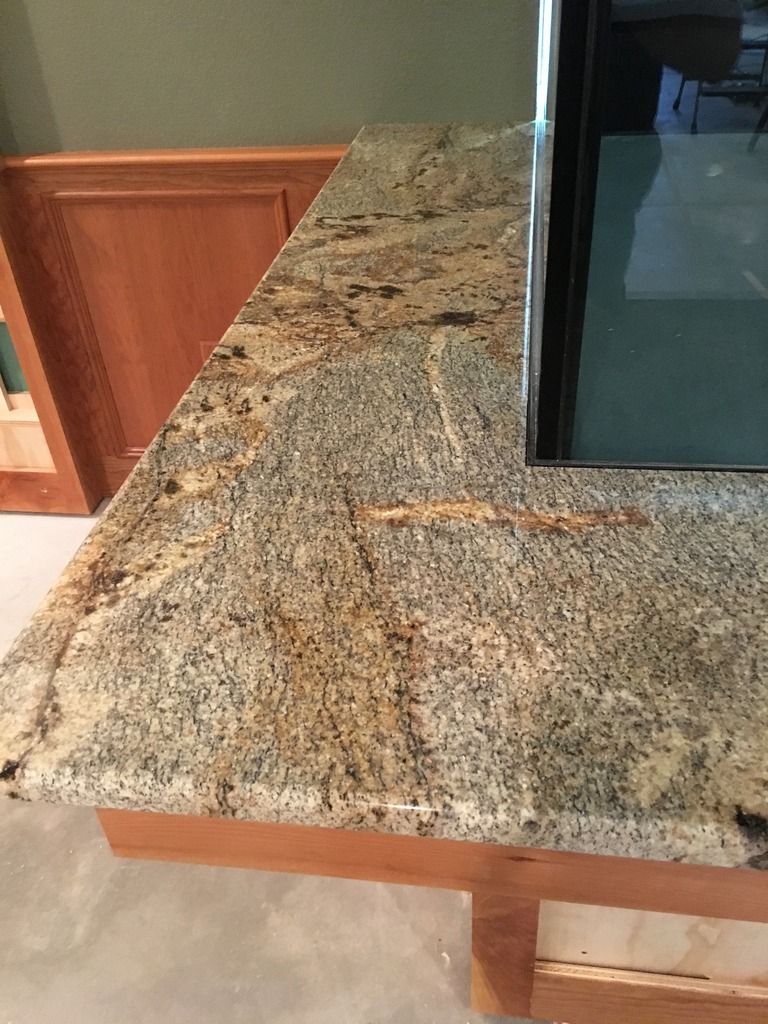
Ok, tank related question. There is a small gap where the granite meets the metal framework that supports the tank. Then there's about 1/4" of black silicone. Does anyone have any ideas on what could be put in place to both seal in the granite to the metal and cover up that small eye-sore? I could put a small 1/2" wood trim piece there with silicone. That would keep the water from getting down into the crack. But, I have enough wood in the basement. I'm thinking some sort of small acrylic trim piece but I don't think that would bond well with the silicone. I considered running a bead of black silicone, but it would be a pretty massive glob. I don't think I could make that look good.
You can do acrylic. Although silicone does not bond to acrylic it usually sticks pretty well. Especially if you use an adhesive silicone vs sealer in my opinion. But since this is not necessarily structural. I bet it'd work. Or maybe different plastic of some sort.
Just curious what part of the picture are you referring to.? The gap between tank and granite that doesnt look big at all. Id honestly probably just caulk it.
Just curious what part of the picture are you referring to.? The gap between tank and granite that doesnt look big at all. Id honestly probably just caulk it.
I'll take a closer picture tonight. You're right that the gap between the metal framework on the aquarium and the granite isn't big. That can easily be filled with silicone.
I'm just thinking that I'd have silicone filling that gap and then the big glob of silicone sealing the metal frame to the aquarium glass. Id like to cover that up if possible. That's one of the few complaints I had with the tank. That part of the tank construction was kind of done poorly. It's solid and I'm sure it won't leak but Marineland even does a better job of creating an aesthetically clean finish on their tanks. It's not a clean bead of caulk they applied. Just a functional bead. That's probably my OCD talking but it's a small detail I can't ignore after putting so much effort into the rest of the build on this side of the glass.
I'll post up a better pic tonight. Thanks for the feedback.
Sent from my iPhone using Tapatalk
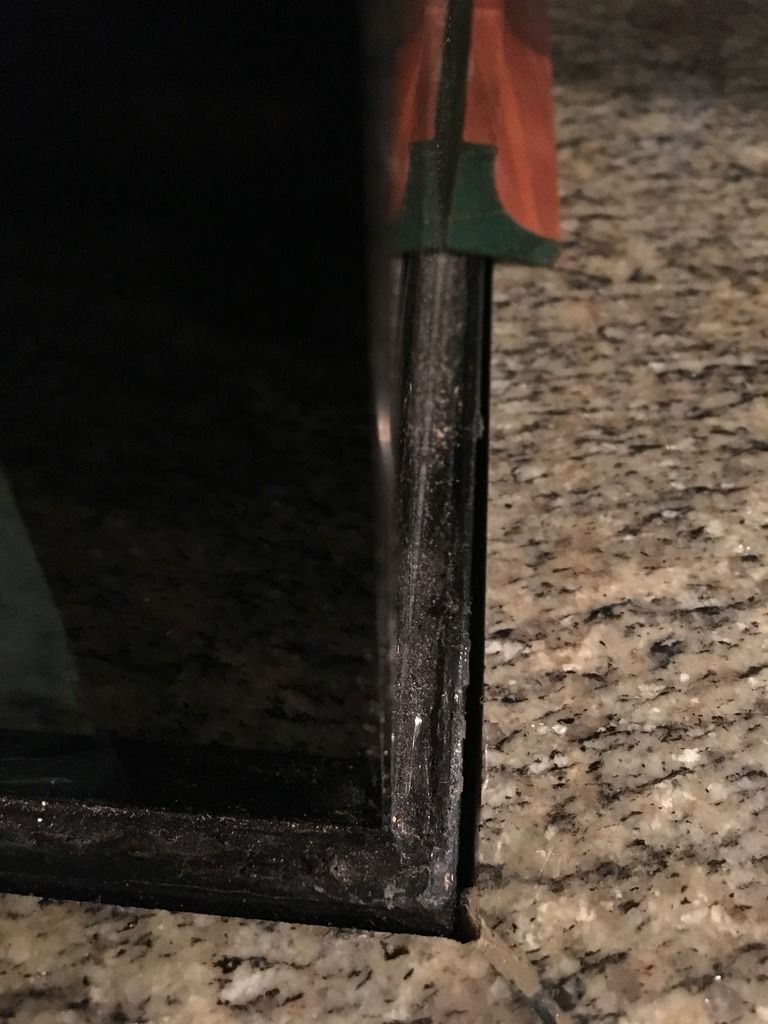
The grout would defiantly be a good option to close in the seam between the granite and metal. That would look better than just a bead of silicone.
Thanks! I'll let you know when I have some solution in place.
For now, I'm in a mad rush to get everything prepped for rock this weekend.
Sent from my iPhone using Tapatalk
Thanks! I'll let you know when I have some solution in place.
For now, I'm in a mad rush to get everything prepped for rock this weekend.
Sent from my iPhone using Tapatalk
Smiley;655923 said:
Silly idea, not quite sure what it would look like, but take an acrylic round and silicone it in the corner to hide the granite to metal transition?? Maybe add an LED accent to it? Fiber optic?
Smiley
Smiley
I actually had a crazy idea of my own. I will have some sort of substrate in the tank (not bare bottom). My idea was to put a large blob of silicone outside the tank, the transition I'm trying to cover up, and squish the crushed coral substrate into it outside the tank. That would be level with the substrate inside the tank. It might make you feel like you were right inside the tank and less like you're staring at a glass box. The wife didn't approve. I thought it was brilliant.
Some time next week I'll make a small trim piece out of wood to show what I'm trying to accomplish. I might end up making it out of black acrylic in the end.
Thanks Smiley.
Sent from my iPhone using Tapatalk